20 posts tagged with "Cloud"

View All Tags

AWS re:Invent 2020

· 10 min read
Scottie Enriquez
Senior Solutions Developer at Amazon Web Services

Contents

  • Container Support for Lambda
  • Introducing AWS Proton
  • EC2 macOS Instances
  • First-Class .NET 5 Support for Lambda
  • CloudShell

Container Support for Lambda

AWS Lambda supports Docker images up to 10GB in size. They've also provided base images for Lambda runtimes in the new public ECR. For reference, the base Node.js 12 image is ~450MB. The Serverless Application Model (SAM) CLI has already been updated for container support. Instead of specifying a --runtime, engineers can now use the --base-image flag.

sam --version 
# 1.13.2
sam init --base-image amazon/nodejs12.x-base

This creates a Dockerfile for the function.

FROM public.ecr.aws/lambda/nodejs:12
COPY app.js package.json ./
RUN npm install
CMD ["app.lambdaHandler"]

The deploy command also includes container registry support via ECR. With a quick --guided deployment, I produced the following samconfig:

version = 0.1
[default]
[default.deploy]
[default.deploy.parameters]
stack_name = "sam-app-container-support"
s3_bucket = "aws-sam-cli-managed-default-samclisourcebucket-ENTROPY"
s3_prefix = "sam-app-container-support"
region = "us-east-1"
confirm_changeset = true
capabilities = "CAPABILITY_IAM"
image_repository = "ACCOUNT_NUMBER.dkr.ecr.us-east-1.amazonaws.com/IMAGE_REPOSITORY"

All of this made it seamless to deploy a container-based Lambda function with the same ease as zip-based ones. I haven't had the opportunity to do performance testing yet, but per /u/julianwood from the Lambda team, it should be equivalent.

Performance is on par with zip functions. We don't use Fargate. This is pure Lambda. We optimize the image when the function is created and cache the layers, so the startup time is pretty much the same as zip functions.

A fully-functional example can be found in this GitHub repository.

Introducing AWS Proton

AWS Proton is the first fully managed application deployment service for container and serverless applications. Platform engineering teams can use Proton to connect and coordinate all the different tools needed for infrastructure provisioning, code deployments, monitoring, and updates.

During the announcement video, I wasn’t sure what the relationship between Proton and existing DevOps tools like CloudFormation and CodePipeline would be or even who the target audience is. To answer these questions, it makes sense to describe the problem that AWS is aiming to solve.

Per the Containers from the Couch stream, AWS understands that not all teams are able to staff with the requisite expertise on a single team (i.e., one team with software engineers, DevOps engineers, security, etc.). To mitigate this, companies often create leveraged teams to provide a specific set of services to other groups (i.e., a centralized platform team that serves multiple development teams). Leveraged teams have their own set of problems, including becoming resource bottlenecks, lack of adequate knowledge sharing mechanisms, and the inability to define and enforce standards.

Proton aims to bridge this gap by offering tooling to standardize environments and services in templates across an organization. It also supports versioning so that environments and services are appropriately maintained. The expectation is that centralized platform teams can support these templates instead of individual solutions with heavily nuanced CloudFormation templates and DevOps pipelines. In Proton, environments are defined as sets of shared resources that individual services are deployed into. At this time, it’s not possible to deploy services without environments. The configurations for environments and services are intended to be utilized throughout the organization (although cross-account sharing isn’t available yet). Changes to templates are published as major and minor versions that are applied to individual instances. Unfortunately, auto-updates are not yet available. Schemas are used within these templates to define inputs for consumers.

I haven’t been able to find much documentation on how to create templates other than this GitHub repository. The Lambda example there gives insight into the general structure from the /environment and /service directories. Both types are comprised of schemas, manifests, infrastructure, and pipelines.

As mentioned above, schemas are used to capture inputs. In the sample from GitHub, the only shared environment resource is a DynamoDB table, and the time to live specification is parameterized.

/schema.yaml
schema:
format:
openapi: "3.0.0"
environment_input_type: "EnvironmentInput"
types:
EnvironmentInput:
type: object
description: "Input properties for my environment"
properties:
ttl_attribute:
type: string
description: "Which attribute to use as the ttl attribute"
default: ttl
minLength: 1
maxLength: 100

Defining /infrastructure or /pipeline sections of the Proton template requires a manifest to describe how exactly to interpret the infrastructure as code. I can't find any documentation for the accepted values, but the template indicates that templating engines like Jinja are supported and other infrastructure as code options like CDK may be planned for the future.

/manifest.yaml
infrastructure:
templates:
- file: "cloudformation.yaml"
engine: jinja
template_language: cloudformation

Lastly, a CloudFormation template is used to describe the infrastructure and DevOps automation like CodePipeline. Note the use of Jinja templating (specifically environment.ttl_attribute) to reference shared resources and input parameters.

/cloudformation.yaml
AWSTemplateFormatVersion: '2010-09-09'
Transform: AWS::Serverless-2016-10-31
Description: This environment holds a simple DDB table shared between services.
Resources:
AppTable:
Type: AWS::DynamoDB::Table
Properties:
AttributeDefinitions:
- AttributeName: hk
AttributeType: S
- AttributeName: rk
AttributeType: S
BillingMode: PAY_PER_REQUEST
KeySchema:
- AttributeName: hk
KeyType: HASH
- AttributeName: rk
KeyType: RANGE
GlobalSecondaryIndexes:
- IndexName: reverse
KeySchema:
- AttributeName: rk
KeyType: HASH
- AttributeName: hk
KeyType: RANGE
Projection:
ProjectionType: ALL {% if environment.ttl_attribute|length %}
TimeToLiveSpecification:
AttributeName: "{{ environment.ttl_attribute }}"
Enabled: true

When the template is finished, compress the source code, push to S3, create a template, and publish it.

# create an environment template
aws proton-preview create-environment-template \
--region us-east-1 \
--template-name "crud-api" \
--display-name "CRUD Environment" \
--description "Environment with DDB Table"
# create a major version of the template (1)
aws proton-preview create-environment-template-major-version \
--region us-east-1 \
--template-name "crud-api" \
--description "Version 1"
# compress local source code
tar -zcvf env-template.tar.gz environment/
# copy to S3
aws s3 cp env-template.tar.gz s3://proton-cli-templates-${account_id}/env-template.tar.gz --region us-east-1
# delete local artifact
rm env-template.tar.gz
# create a minor version (0)
aws proton-preview create-environment-template-minor-version \
--region us-east-1 \
--template-name "crud-api" \
--description "Version 1" \
--major-version-id "1" \
--source-s3-bucket proton-cli-templates-${account_id} \
--source-s3-key env-template.tar.gz
# publish for users
aws proton-preview update-environment-template-minor-version \
--region us-east-1 \
--template-name "crud-api" \
--major-version-id "1" \
--minor-version-id "0" \
--status "PUBLISHED"
# instantiate an environment
aws proton-preview create-environment \
--region us-east-1 \
--environment-name "crud-api-beta" \
--environment-template-arn arn:aws:proton:us-east-1:${account_id}:environment-template/crud-api \
--template-major-version-id 1 \
--proton-service-role-arn arn:aws:iam::${account_id}:role/ProtonServiceRole \
--spec file://specs/env-spec.yaml

The process for publishing and instantiating services is largely the same.

EC2 macOS Instances

The prospect of having macOS support for EC2 instances is exciting, but the current implementation has some severe limitations. First off, the instances are only available via dedicated hosts with a minimum of a 24-hour tenancy. At an hourly rate of USD 1.083, it’s hard to imagine this being economically viable outside of particular use cases. The only AMIs available are 10.14 (Mojave) and 10.15 (Catalina), although 11.0 (Big Sur) is coming soon. There’s also no mention of support for AWS Workspaces yet, which I hope is a future addition given the popularity of macOS amongst engineers. Lastly, the new Apple M1 ARM-based chip isn’t available until next year.

Despite the cost, I still wanted to get my hands on an instance. I hit two roadblocks while getting started. First, I had to increase my service quota for mac1 dedicated hosts. Second, I had to try several availability zones to find one with dedicated hosts available (use1-az6). I used the following CLI commands to provision a host and instance.

# create host and echo ID
aws ec2 allocate-hosts --instance-type mac1.metal \
--availability-zone us-east-1a --auto-placement on \
--quantity 1 --region us-east-1
# create an EC2 instance on the host
aws ec2 run-instances --region us-east-1 \
--instance-type mac1.metal \
--image-id ami-0e813c305f63cecbd \
--key-name $KEY_PAIR --associate-public-ip-address \
--placement 'HostId=$HOST_ID' \
--block-device-mappings 'DeviceName=/dev/sda1,Ebs={DeleteOnTermination=true,VolumeSize=250,VolumeType=gp2}'

After that, I was able to SSH in and experience EC2 macOS in all its glory.

             .:'
__ :'__ __| __|_ )
.'` `-' ``. _| ( /
: .-' ___|\___|___|
: :
: `-; Amazon EC2
`.__.-.__.' macOS Catalina 10.15.7

Thanks to this awesome blog post, I was able to put together an EC2 user data script for remote access.

sudo su
dscl . -create /Users/Scottie
dscl . -create /Users/Scottie UserShell /bin/zsh
dscl . -create /Users/Scottie RealName "Scottie Enriquez"
dscl . -create /Users/Scottie UniqueID 1000
dscl . -create /Users/Scottie PrimaryGroupID 1000
dscl . -create /Users/Scottie NFSHomeDirectory /Users/Scottie
dscl . -passwd /Users/Scottie $USER_PASSWORD
dscl . -append /Groups/admin GroupMembership Scottie
/System/Library/CoreServices/RemoteManagement/ARDAgent.app/Contents/Resources/kickstart \
-activate -configure -access -on \
-clientopts -setvnclegacy -vnclegacy yes \
-clientopts -setvncpw -vncpw $VNC_PASSWORD \
-restart -agent -privs -all

I then used VNC Viewer to connect over port 5900.
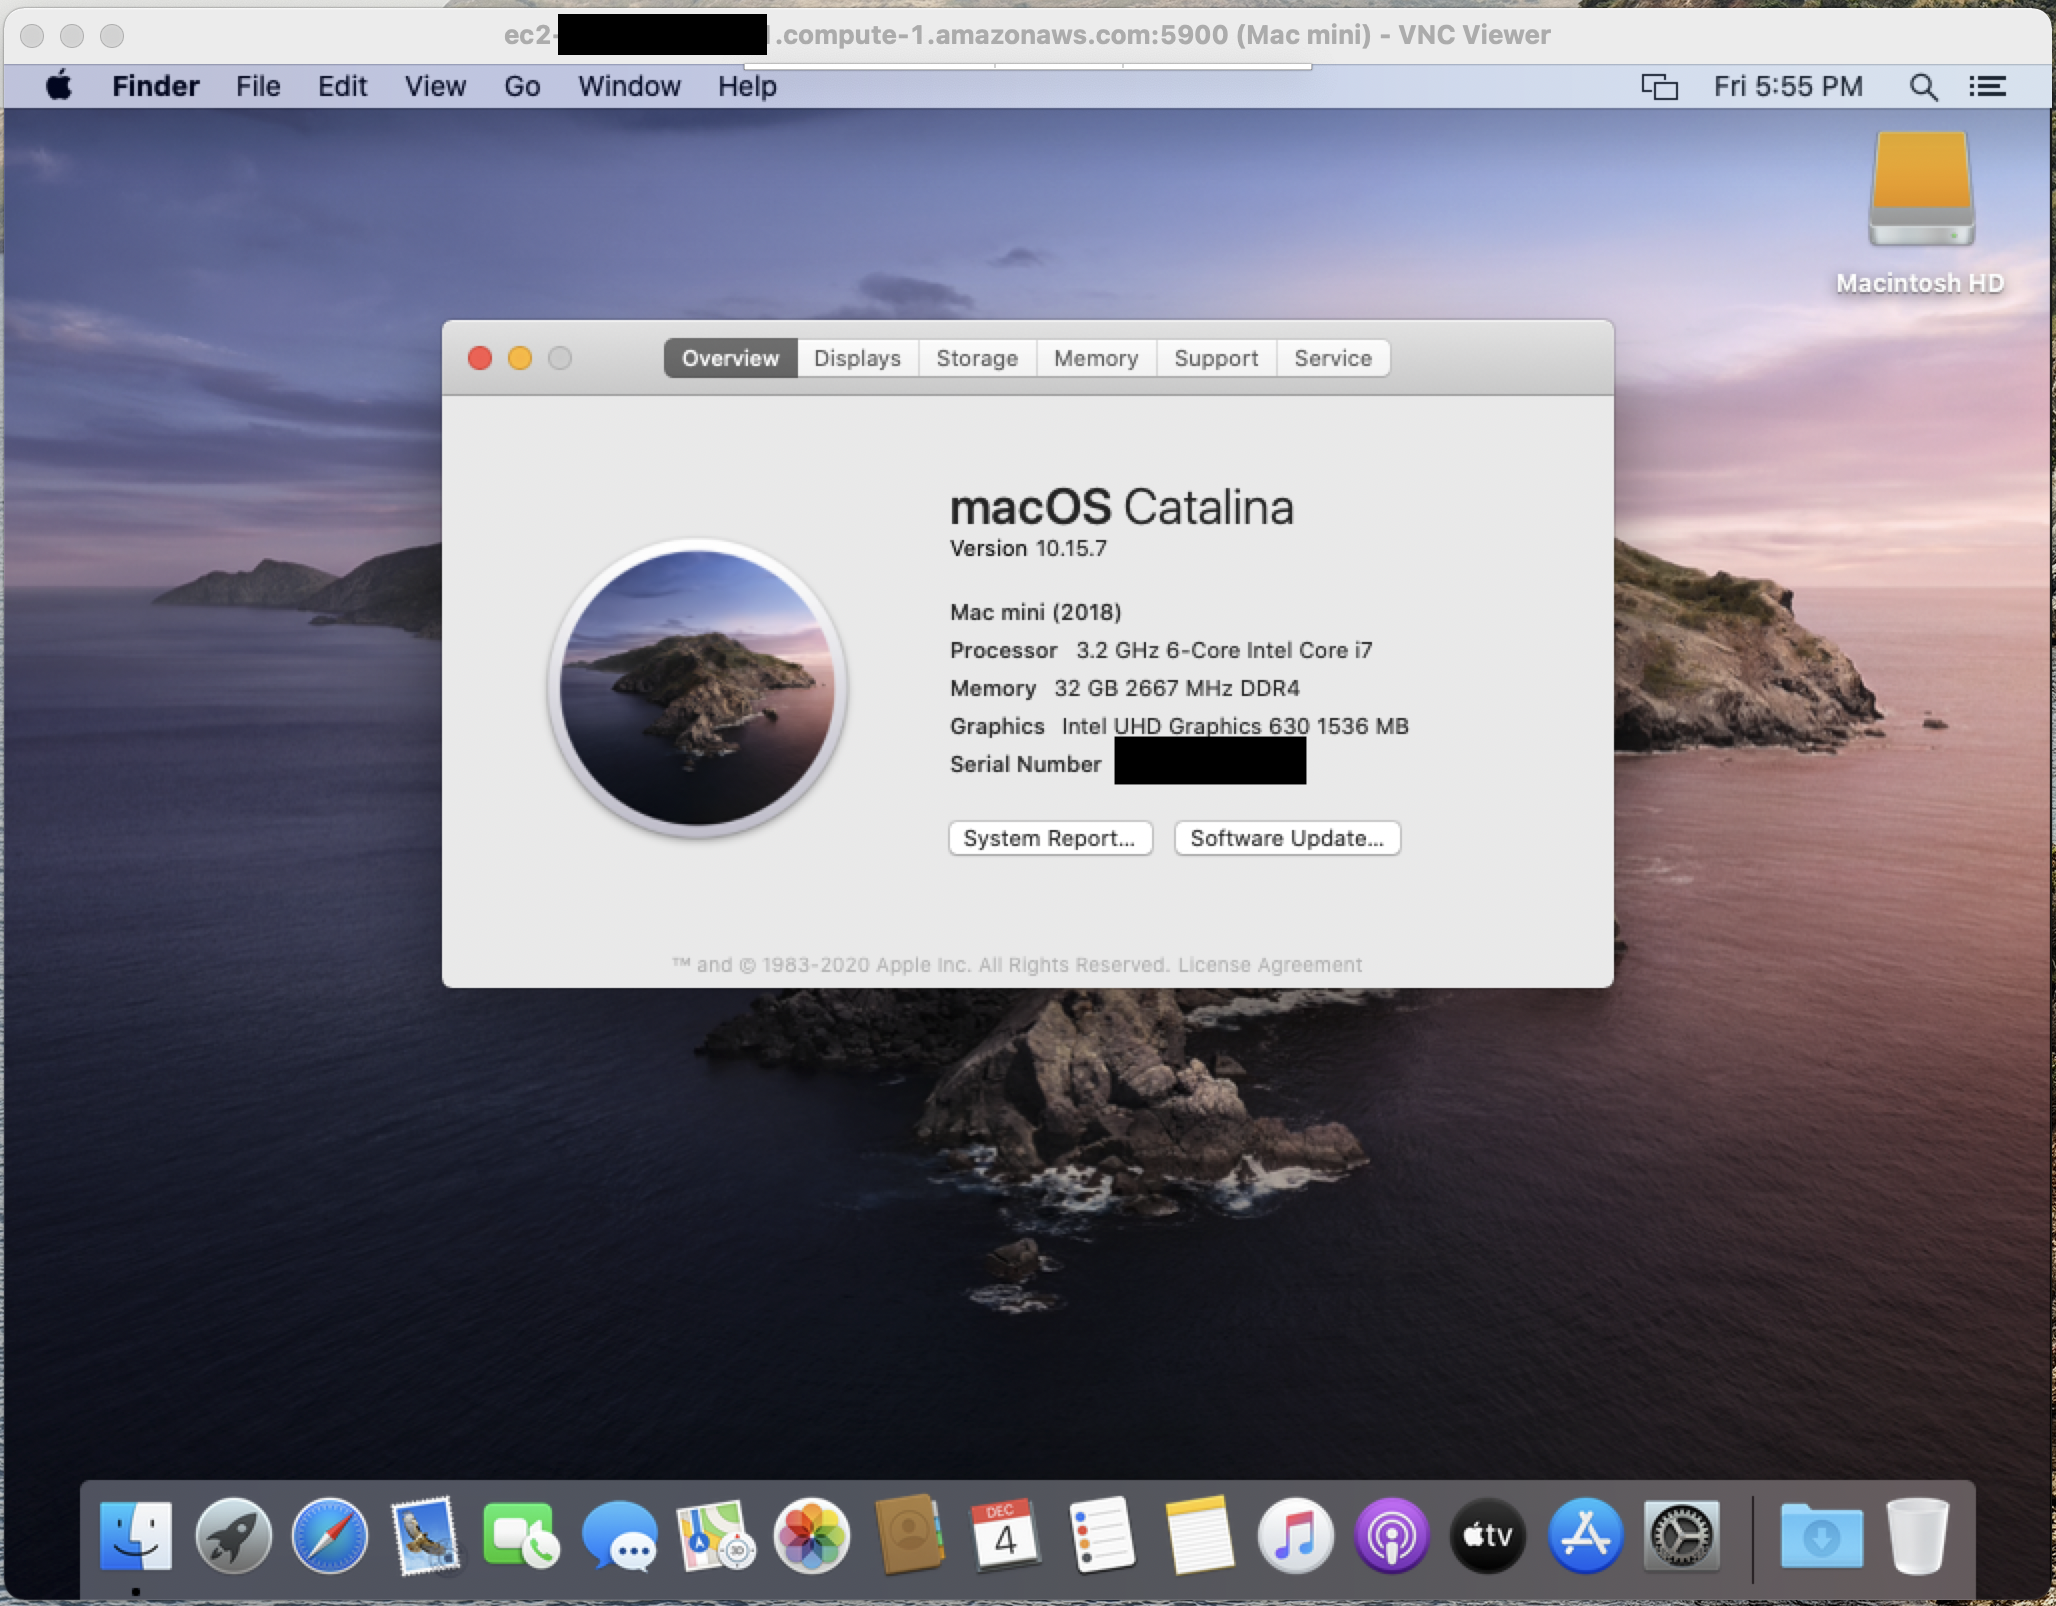
macOS on EC2

First-Class .NET 5 Support for Lambda

According to AWS:

.NET 5, which was released last month, is a major release towards the vision of a single .NET experience for .NET Core, .NET Framework, and Xamarin developers. .NET 5 is a “Current” release and is not a long term supported (LTS) version of .NET. The next LTS version will be .NET 6, which is currently scheduled to be released in November 2021. .NET 5 will be supported for 3 months after that date, which means that .NET 5 will be supported for about 15 months in total. In comparison, .NET 6 will have 3 years of support. Even though Lambda’s policy has always been to support LTS versions of language runtimes for managed runtimes, the new container image support makes .NET 5 a first-class platform for Lambda functions.

While AWS has already released the .NET 5 public ECR image, SAM support as a --base-image hasn't been implemented yet as of version 1.13.2. Porting from a .NET Core starter template is as easy as changing the <TargetFramework> in the .csproj file and updating the Dockerfile.

FROM mcr.microsoft.com/dotnet/sdk:5.0 as build-image

ARG FUNCTION_DIR="/build"
ARG SAM_BUILD_MODE="run"
ENV PATH="/root/.dotnet/tools:${PATH}"

RUN apt-get update && apt-get -y install zip

RUN mkdir $FUNCTION_DIR
WORKDIR $FUNCTION_DIR
COPY Function.cs HelloWorld.csproj aws-lambda-tools-defaults.json $FUNCTION_DIR/
RUN dotnet tool install -g Amazon.Lambda.Tools

RUN mkdir -p build_artifacts
RUN if [ "$SAM_BUILD_MODE" = "debug" ]; then dotnet lambda package --configuration Debug; else dotnet lambda package --configuration Release; fi
RUN if [ "$SAM_BUILD_MODE" = "debug" ]; then cp -r /build/bin/Debug/net5.0/publish/* /build/build_artifacts; else cp -r /build/bin/Release/net5.0/publish/* /build/build_artifacts; fi

FROM public.ecr.aws/lambda/dotnet:5.0

COPY --from=build-image /build/build_artifacts/ /var/task/
CMD ["HelloWorld::HelloWorld.Function::FunctionHandler"]

A working example can be found here.

CloudShell

Finally catching up with both Azure and Google Cloud, AWS announced the launch of CloudShell:

AWS CloudShell is a browser-based shell that makes it easy to securely manage, explore, and interact with your AWS resources. CloudShell is pre-authenticated with your console credentials. Common development and operations tools are pre-installed, so no local installation or configuration is required. With CloudShell, you can quickly run scripts with the AWS Command Line Interface (AWS CLI), experiment with AWS service APIs using the AWS SDKs, or use a range of other tools to be productive. You can use CloudShell right from your browser and at no additional cost.

Bash, Zsh, and PowerShell are available as shell options, and run commands can be customized in a typical ~/.bashrc or ~/.zshrc fashion. The free gigabyte of storage persists in the $HOME directory, making it easy to stash working files. While there are several runtimes like Node.js and Python installed alongside Vim, doing development in CloudShell is not as ergonomic as Cloud9 or a local machine. I can see this tool being useful when combined with something like container tabs in Firefox to interact with multiple AWS accounts from the browser instead of running commands in a local terminal with --profile flags.

Cloud9 IDE Configuration

· 3 min read
Scottie Enriquez
Senior Solutions Developer at Amazon Web Services

Cloud9 Overview and Use Cases

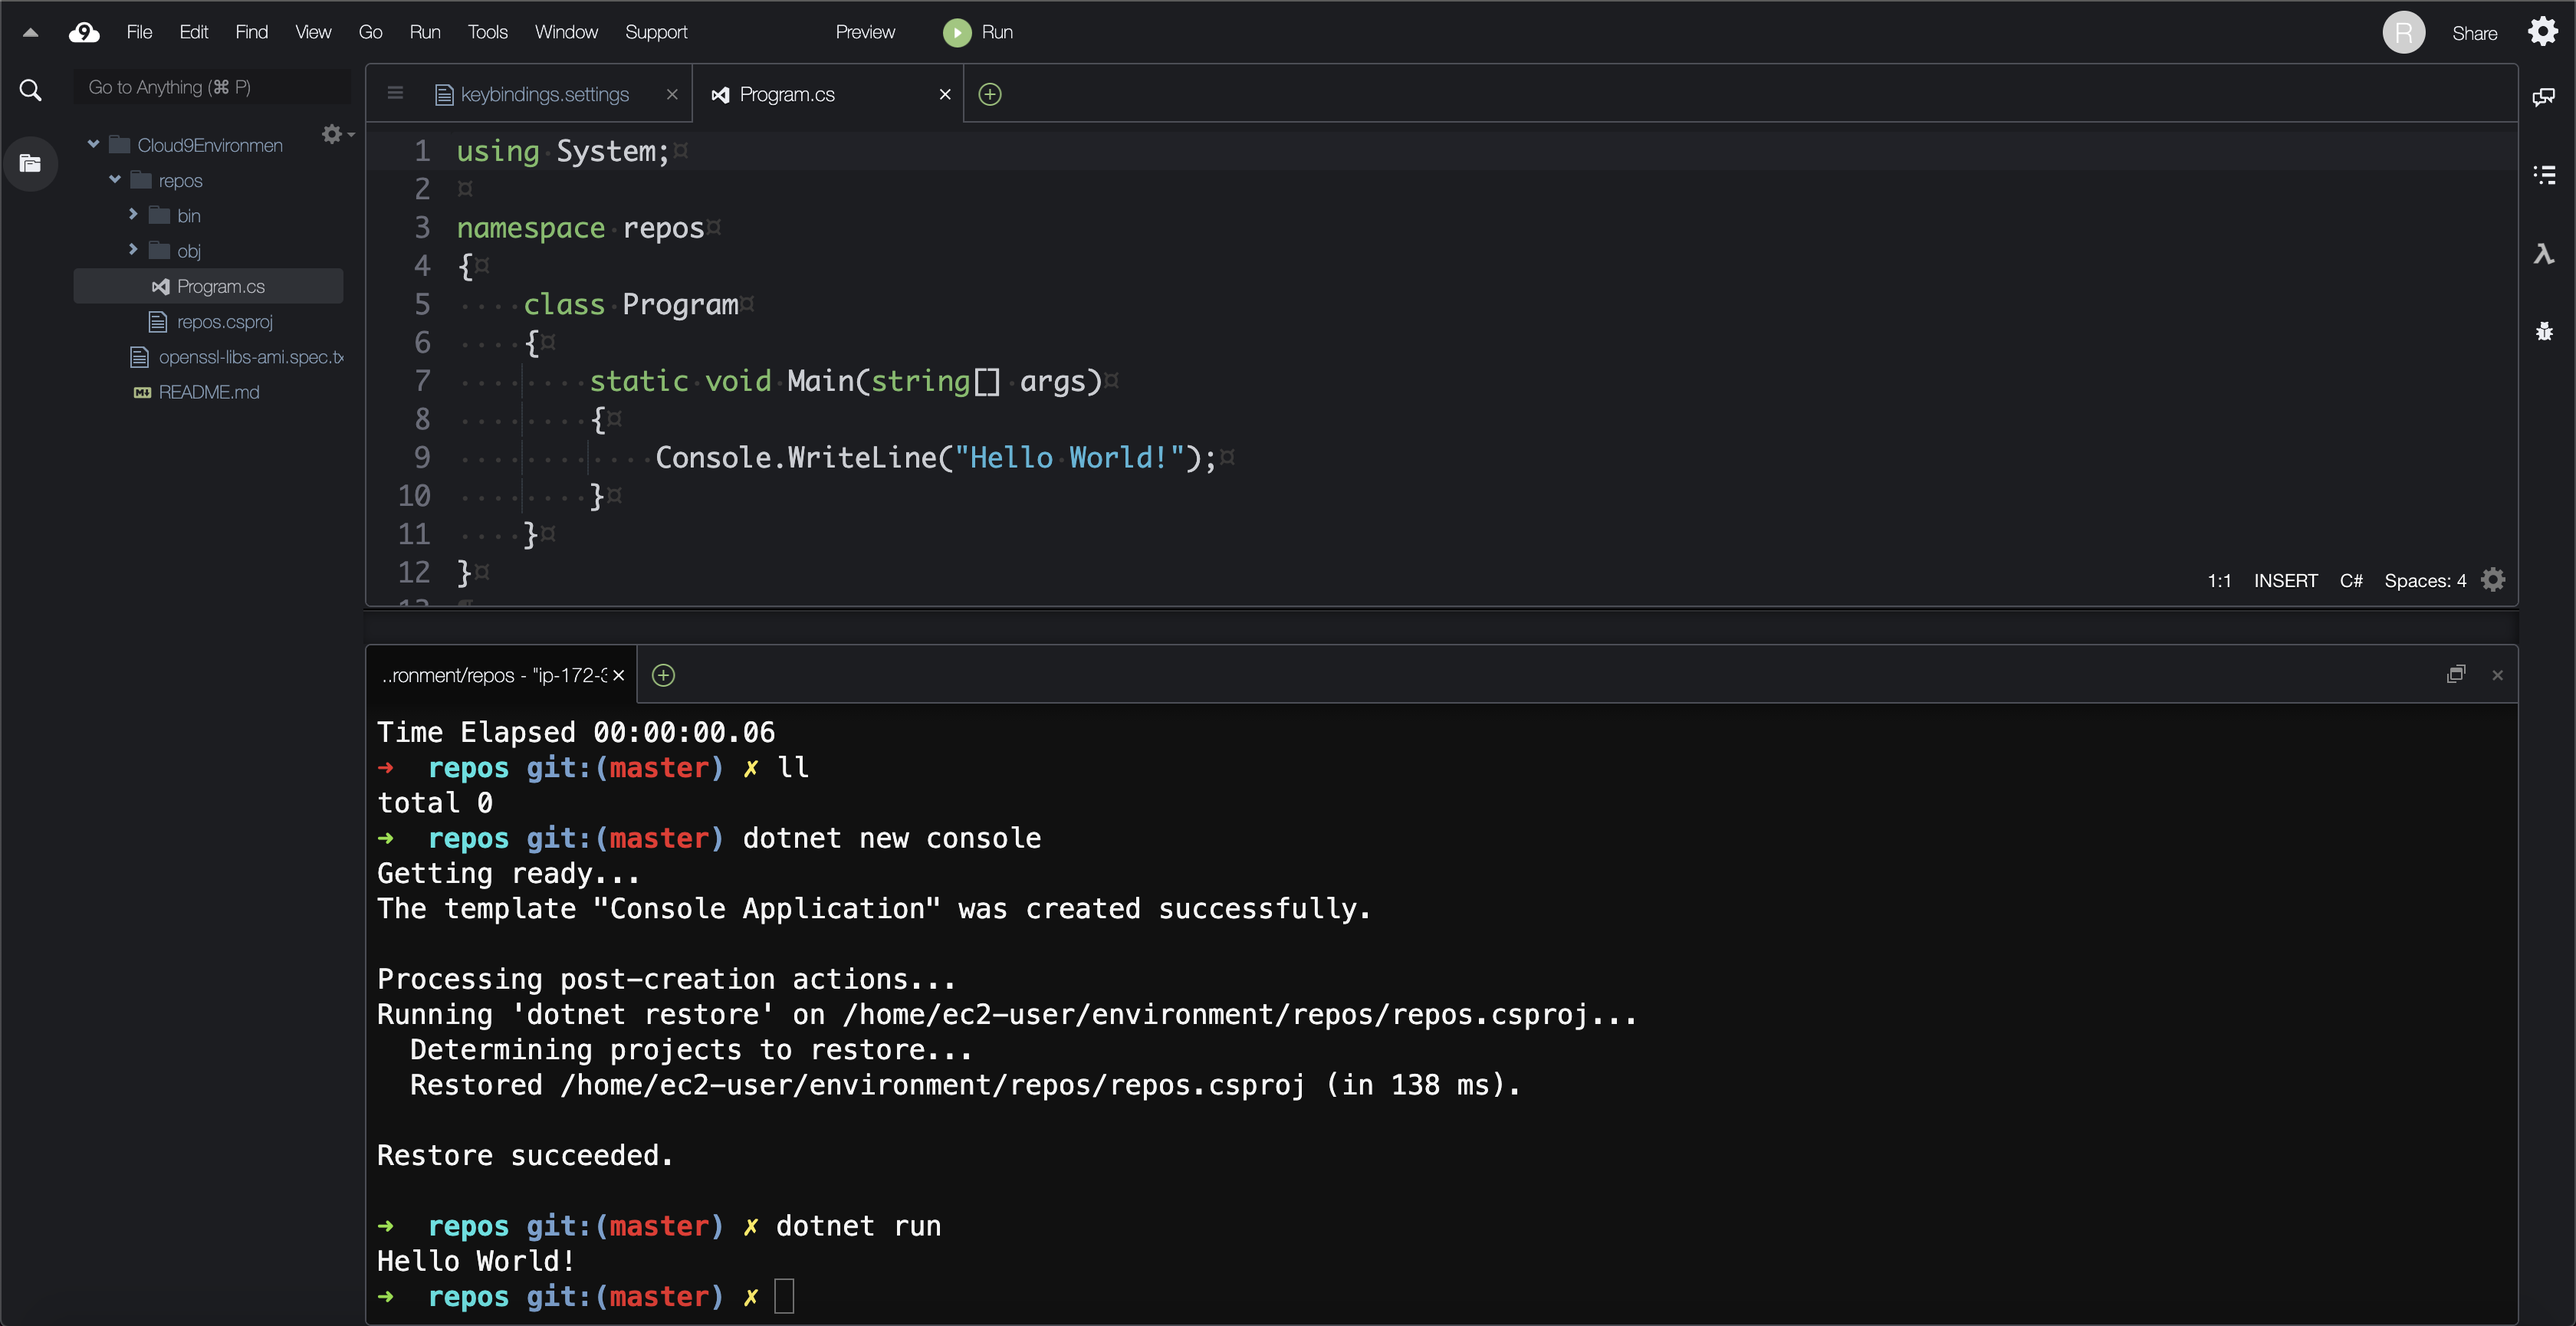
Per AWS, "Cloud9 is a cloud-based integrated development environment (IDE) that lets you write, run, and debug your code with just a browser. It includes a code editor, debugger, and terminal. Cloud9 comes prepackaged with essential tools like Docker and support for popular programming languages, including JavaScript, Python, PHP, and .NET." The AWS, Serverless Application Model (SAM), and Cloud Development Kit (CDK) CLIs are pre-installed as well. Users are abstracted from credential management (i.e., there's no need to provision an IAM user and run aws configure). Since the underlying compute is an EC2 instance, developers have a consistent experience across client devices.

Cloud9

Cloud9 makes it easy to declare an environment using CloudFormation, specify Git repositories to clone during the provisioning process, and share various custom settings such as themes and keybindings with developers. It's also a cheap option since the EC2 instance shuts itself down after a set period of time (with a default of 30 minutes).

Initial Setup

The first deployment fails unless a Cloud9 environment has been created from the Console due to an IAM service role created in the process (service-role/AWSCloud9SSMAccessRole). See more information in the AWS documentation.

AWS Resources Created

  • A Cloud9 environment with an m5.large instance EC2 instance
  • A CodeCommit repository for stashing work since the Cloud9 environment is considered transient

CloudFormation Template

Resources:
rCloud9Environment:
Type: AWS::Cloud9::EnvironmentEC2
Properties:
AutomaticStopTimeMinutes: 30
ConnectionType: CONNECT_SSM
Description: Web-based cloud development environment
InstanceType: m5.large
Name: Cloud9Environment
Repositories:
- PathComponent: /repos/codecommit
RepositoryUrl: !GetAtt rCloud9WorkingRepository.CloneUrlHttp
- PathComponent: /repos/aws-cloud9-environment
RepositoryUrl: https://github.com/scottenriquez/aws-cloud9-environment.git
rCloud9WorkingRepository:
Type: AWS::CodeCommit::Repository
Properties:
RepositoryName: Cloud9WorkingRepository
RepositoryDescription: A CodeCommit repository for stashing work from the Cloud9 IDE

This template can be deployed via the AWS Console or the AWS CLI.

Initialization Script

wget https://github.com/dotnet/core/files/2186067/openssl-libs-ami.spec.txt
rpmbuild --bb openssl-libs-ami.spec.txt
sudo rpm -i /usr/src/rpm/RPMS/x86_64/openssl-libs-1.0.0-0.x86_64.rpm
sudo rpm -Uvh https://packages.microsoft.com/config/centos/7/packages-microsoft-prod.rpm
sudo yum install dotnet-sdk-3.1 zsh
sudo passwd ec2-user
chsh -s /bin/zsh
sh -c "$(curl -fsSL https://raw.github.com/ohmyzsh/ohmyzsh/master/tools/install.sh)"

The user-data.sh script is intended to run when the Cloud9 instance spins up (mirroring the EC2 instance paramater of the same name). Unfortunately, this setup must be done manually since there isn't a parameter in the CloudFormation resource. To make this easier, I've added this GitHub repository to the list to clone on the instance.

The Bash script does the following:

  • Installs .NET Core 3.1
  • Installs Zsh and Oh My Zsh
  • Resets the ec2-user password
  • Changes the default shell to Zsh

User Settings

{
"ace": {
"@behavioursEnabled": true,
"@fontSize": 18,
"@keyboardmode": "vim",
"@showGutter": true,
"@showInvisibles": true,
"@theme": "@c9/ide/plugins/c9.ide.theme.jett/ace.themes/jett",
"custom-types": {
"json()": {
"settings": "javascript"
}
},
"statusbar": {
"@show": true
}
},
"build": {
"@autobuild": false
},
"collab": {
"@timeslider-visible": false
},
"configurations": {},
"debug": {
"@autoshow": true,
"@pause": 0
},
"general": {
"@autosave": "afterDelay",
"@skin": "jett-dark"
},
"key-bindings": {
"@platform": "auto",
"json()": []
},
"openfiles": {
"@show": false
},
"output": {},
"projecttree": {
"@showhidden": false
},
"tabs": {
"@show": true
},
"terminal": {
"@fontsize": 18
}
}

Much like the user-data, the user settings aren't parameterized in CloudFormation. These settings are included in the repository but must be manually configured.

Using Former2 for Existing AWS Resources

· 5 min read
Scottie Enriquez
Senior Solutions Developer at Amazon Web Services

Overview

I've been making a concerted effort lately to use infrastructure as code via CloudFormation for all of my personal AWS-hosted projects. Writing these templates can feel a bit tedious, even with editor tooling and plugins. I thought it would be awesome to generate CloudFormation templates for existing resources and first found CloudFormer. I found blog posts about CloudFormer from as far back as 2013, but it was never advertised much.

Update: Former2 is the de facto standard now that CloudFormer has been deprecated. I kept my notes on CloudFormer for posterity at the end of the post.

Getting Started with Former2

Former2 takes a client-side approach to infrastructure as code template generation and has support for Terraform and CDK. Instead of an EC2 instance, it uses the JavaScript SDKs via your browser to make all requisite API calls. You can even use the static website hosted on the public internet. If you're not keen on the idea of passing read-only IAM credentials to a third-party website, clone the repository and run the web application locally via the file system or Docker. I've also created a CloudFormation template to run it on an EC2 instance:

AWSTemplateFormatVersion: "2010-09-09"
Parameters:
pAllowedIpCidr:
Type: String
AllowedPattern: '((\d{1,3})\.){3}\d{1,3}/\d{1,2}'
Default: '0.0.0.0/0'
pLatestAl2AmiId:
Type: AWS::SSM::Parameter::Value<AWS::EC2::Image::Id>
Default: /aws/service/ami-amazon-linux-latest/amzn2-ami-hvm-x86_64-gp2
pVpcId:
Type: AWS::EC2::VPC::Id
pSubnetId:
Type: AWS::EC2::Subnet::Id
pKeyPairName:
Type: AWS::EC2::KeyPair::KeyName
Description: A self-hosted instance of Former2 on EC2
Resources:
rEc2SecurityGroup:
Type: AWS::EC2::SecurityGroup
Properties:
GroupDescription: Former2 security group
GroupName: Former2
VpcId: !Ref pVpcId
SecurityGroupIngress:
-
CidrIp: !Ref pAllowedIpCidr
IpProtocol: tcp
FromPort: 80
ToPort: 443
SecurityGroupEgress:
-
CidrIp: !Ref pAllowedIpCidr
IpProtocol: tcp
FromPort: 80
ToPort: 443
rEc2Instance:
Type: AWS::EC2::Instance
Properties:
UserData:
Fn::Base64: |
#!/bin/bash
yum update -y
yum install git httpd -y
systemctl start httpd
systemctl enable httpd
cd /var/www/html
git clone https://github.com/iann0036/former2.git .
ImageId: !Ref pLatestAl2AmiId
InstanceType: t2.micro
KeyName: !Ref pKeyPairName
Tenancy: default
SubnetId: !Ref pSubnetId
EbsOptimized: false
SecurityGroupIds:
- !Ref rEc2SecurityGroup
SourceDestCheck: true
BlockDeviceMappings:
-
DeviceName: /dev/xvda
Ebs:
Encrypted: false
VolumeSize: 8
VolumeType: gp2
DeleteOnTermination: true
HibernationOptions:
Configured: false
Outputs:
PublicIp:
Description: Former2 EC2 instance public IP address
Value: !GetAtt rEc2Instance.PublicIp
Export:
Name: !Sub "${AWS::StackName}-PublicIp"

Use Cases for Generating Templates

Overall I’d argue that addressing the minor changes is easier than writing a template from scratch. With that being said, I don’t know that I’d ever spin up resources via the Console with the sole intent of creating CloudFormation templates. However, it could make migrating from a prototype to a productionized product easier if you’re willing to pay a small compute cost.

Getting Started with CloudFormer

Setting up CloudFormer is quite simple through CloudFormation. In fact, it's a sample template that creates a stack with several resources:

  • AWS::EC2::Instance
  • AWS::EC2::SecurityGroup
  • AWS::IAM::InstanceProfile
  • AWS::IAM::Role
  • AWS::IAM::Policy

The template has a few parameters as well:

  • Username
  • Password
  • VPC

After creating the stack like any other CloudFormation template, a URL is outputted. The t2.small EC2 instance is a web server with a public IPv4 address and DNS configured behind the scenes. The security group allows all traffic (0.0.0.0/0) on port 443, but it's worth noting that I did have an SSL issue with my instance that threw a warning in my browser. The instance profile is used by the web server to assume the IAM role with an attached policy that allows for widespread reads across resources and writes to S3. Keep in mind that the CloudFormer stack should be deleted after to use to avoid unnecessary compute charges for the EC2 instance.

Using the CloudFormer Web Server

Navigate to the URL from the output tab of the CloudFormation stack (something like https://ec2-0-0-0-0.compute-1.amazonaws.com) and enter the username and password that you specified as a parameter. Via the GUI, select the resources to reverse engineer across the following categories:

  • DNS
  • VPC
  • VPC Network
  • VPC Security
  • Network
  • Managed
  • Services
  • Managed Config
  • Compute
  • Storage
  • Storage Config
  • App Services
  • Security
  • Operational

The list is robust but not all-inclusive.

Creating a Template for a CloudFront Distribution

I have a public CDN in one of my AWS accounts for images on a JAMstack site hosted on Netlify. It uses a standard design: a private S3 bucket behind a CloudFront distribution with an Origin Access Identity. Through the CloudFormer workflow, I selected the individual components:

  • CloudFront distribution
  • S3 bucket
  • Bucket policy

Sadly, there's no support for YAML as of right now. The web server generated a JSON template, which I converted to YAML via the Designer.

I plugged the template back into CloudFormation, and everything provisioned successfully. Digging deeper into the template, I noticed a few minor changes to make. First of all, the logical names are based on specifics of the existing resources (e.g., distd1yqxti3jheii7cloudfrontnet came from the URL of the CDN). However, these can easily be refactored. Since CloudFormer doesn't support creating an OAI, the existing identity is hardcoded. I added a resource for that to the template and converted the hardcoded value to a reference.

Azure DevOps CI/CD Pipeline for an AWS Lambda Node.js Function

· 9 min read

Overview

This project serves as an end-to-end working example for testing, building, linting, and deploying an AWS Lambda Node.js function to multiple environments using AWS CloudFormation, Azure Pipelines, and Azure DevOps. The complete source code is located in this GitHub repository, and the build output is publicly available via Azure DevOps.

Setting Up a Git Repository

Even though I'm using Azure Pipelines for CI/CD instead of Travis CI, you can easily host the code in a Git repository on Azure DevOps or GitHub. Microsoft's GitHub integration is seamless, so there's no reason not to use it should you choose to host your source code there. All features like pull request integration and showing build status alongside each commit on GitHub behave exactly like Travis CI. To enable GitHub integration, simply navigate to the Azure DevOps project settings tab, select 'GitHub connections', then follow the wizard to link the repository of your choice.

Creating an NPM Project for the Lambda Function

A simple npm init command will create the package.json file and populate relevant metadata for the Lambda function. All dependencies and development dependencies are documented there.

Implementing a Sample Lambda Function

In the root of the project, there's a file called index.js with the Lambda function logic. For this example, the handler function simply returns a 200 status code with a serialized JSON body.

index.js
exports.handler = async event => ({
statusCode: 200,
body: JSON.stringify("Hello from Lambda!"),
})

Adding Unit Tests and Code Coverage

First, install a few development dependencies using the command npm install --save-dev mocha chai nyc. I've added a unit test in the file test/handler.test.js:

test/handler.test.js
const mocha = require("mocha")
const chai = require("chai")
const index = require("../index")

const { expect } = chai
const { describe } = mocha
const { it } = mocha

describe("Handler", async () => {
describe("#handler()", async () => {
it("should return a 200 response with a body greeting the user from Lambda ", async () => {
const expectedResponse = {
statusCode: 200,
body: JSON.stringify("Hello from Lambda!"),
}
const actualResponse = await index.handler(null)
expect(actualResponse).to.deep.equal(expectedResponse)
})
})
})

To configure code coverage rules for the CI/CD pipeline, add a .nycrc (Istanbul configuration) file to the root of the project. For this example, I've specified 80% across branches (i.e. if statement paths), lines, functions, and statements. You can also whitelist files to apply code coverage rules with the include attribute.

.nycrc
{
"branches": 80,
"lines": 80,
"functions": 80,
"statements": 80,
"check-coverage": true,
"all": true,
"include": ["**.js"]
}

With this in place, wire up everything in the package.json with the proper test command:

package.json
...
"scripts": {
"test": "nyc --reporter=text mocha"
},
...

You can verify that everything is configured correctly by running npm test to view unit testing results and code coverage reports.

Configuring Code Linting and Styling

It's important to think of linting and styling as two separate entities. Linting is part of the CI/CD pipeline and serves as static code analysis. This provides feedback on the code that could potentially cause bugs and should cause a failure in the pipeline if issues are found. Styling, on the other hand, is opinionated and provides readability and consistency across the codebase. However, it may not be part of build pipeline itself (i.e. causing the build to fail if a style rule is violated) and should be run locally prior to a commit.

For configuring ESLint, I used @wesbos' configuration as a base using the command npx install-peerdeps --dev eslint-config-wesbos. Detailed instructions can be found in his README. This makes the .eslintrc config in the root quite clean:

.eslintrc
{
"extends": ["wesbos"]
}

Given that code styling is quite opinionated, I won't inject any biases here. To install Prettier, use the command npm install prettier and add .prettierrc and .prettierignore files to the root.

With this in place, you can add linting and Prettier commands to the package.json:

package.json
...
"scripts": {
"lint": "eslint .",
"lint:fix": "eslint . --fix",
"format": "prettier --write \"**/*.{js,jsx,json,md}\""
},
...

Though there is no configuration managed in this repository for code styling, note that you can enable an IDE like Visual Studio Code or JetBrains' WebStorm to apply styling rules upon saving a file.

Enabling Continuous Integration Using Azure Pipelines

Via the Azure DevOps web UI, you can directly commit an initial azure-pipelines.yml file to the root of the repository and configure the trigger (i.e. commits). Once the NPM scripts are properly set up like above, the build stage can be configured to install dependencies, run unit tests, and handle linting in a few lines of code. Note that I've added an archive step because Lambda functions are deployed as ZIP files later in the pipeline.

azure-pipelines.yml
stages:
- stage: Build
jobs:
- job: BuildLambdaFunction
pool:
vmImage: "ubuntu-latest"
continueOnError: false
steps:
- task: NodeTool@0
inputs:
versionSpec: "12.x"
displayName: "Install Node.js"
- script: |
npm install
npm run lint
npm test
displayName: "NPM install, lint, and test"
- task: ArchiveFiles@2
inputs:
rootFolderOrFile: "$(Build.SourcesDirectory)"
includeRootFolder: true
archiveType: "zip"
archiveFile: "$(Build.ArtifactStagingDirectory)/LambdaBuild.zip"
replaceExistingArchive: true
verbose: true

For now, there is only one stage in the pipeline, but additional stages will be managed in the same YAML file later. The code above spins up a Linux virtual machine, installs Node.js version 12.x, installs the dependencies specified in the package.json file, runs ESLint, and finally runs the unit tests. The logs are made available via Azure DevOps, and the virtual machine is destroyed after the build is complete. If an error occurs at any point (i.e lint issue, failed unit test, etc.), the build does not continue.

Configuring Local Azure Pipeline Builds

As indicated by the nomenclature, Azure Pipelines run in the cloud. It's worth noting that it is possible to host your own build agents if you so choose. Setting it up does take quite a bit of configuration, so for this project, I opted to use the cloud-hosted agent instead. Microsoft has extensive documentation for setting this up, and I've included the Dockerfile in the dockeragent/ directory.

Enabling Infrastructure as Code Using AWS CloudFormation

One of the core goals of this project is to create a complete solution with everything from the source code to the build pipeline and cloud infrastructure managed under source control. CloudFormation is a technology from AWS that allows engineers to specify solution infrastructure as JSON or YAML. For this solution, I specified a Lambda function and an IAM role. Note that the build artifact will be sourced from an additional S3 staging bucket not detailed in the CloudFormation template.

cloudformation-stack.json
{
"AWSTemplateFormatVersion": "2010-09-09",
"Resources": {
"IAMLambdaRole": {
"Type": "AWS::IAM::Role",
"Properties": {
"AssumeRolePolicyDocument": {
"Version": "2012-10-17",
"Statement": [
{
"Effect": "Allow",
"Principal": {
"Service": ["lambda.amazonaws.com"]
},
"Action": ["sts:AssumeRole"]
}
]
}
}
},
"LambdaFunction": {
"Type": "AWS::Lambda::Function",
"Properties": {
"Code": {
"S3Bucket": "azdo-staging-s3-bucket",
"S3Key": "build.zip"
},
"Handler": "index.handler",
"Runtime": "nodejs12.x",
"Role": {
"Fn::GetAtt": ["IAMLambdaRole", "Arn"]
}
},
"DependsOn": ["IAMLambdaRole"]
}
}
}

With this file in hand, creating and/or updating the infrastructure can be done via the command line using the AWS CLI. After generating an access key and secret key, the CLI can be installed and configured with a few commands. Note that I have specified the commands for Ubuntu (apt-get package manager) since that's the virtual machine image that was specified in the Azure Pipelines YAML.

sudo apt-get install awscli
aws configure set aws_access_key_id $(AWS_ACCESS_KEY_ID)
aws configure set aws_secret_access_key $(AWS_SECRET_KEY_ID)
aws configure set aws_default_region $(AWS_DEFAULT_REGION)

These keys should be treated as a username/password combination. Do not expose them in any public source code repositories or build logs. They should always be stored as secure environment variables in the build pipeline. Azure DevOps will always hide secure environment variables even in public project logs.

After the CLI has been configured, the aws cloudformation deploy command will create or update the infrastructure specified in the template. I recommend testing this command locally before including it in the build pipeline.

Enabling Multi-Stage and Multi-Environment Continuous Deployments

With the ability to deploy cloud infrastructure, the build pipeline can now be a full CI/CD one. In the Azure DevOps UI, environments can be created via the project settings. For this project, I created development, test, and production. These will be referenced in the Azure Pipelines YAML script and capture a history of which build deployed which artifact to the corresponding environment.

Another stage can be added to the YAML script that depends on a successful build:

azure-pipelines.yml
- stage: DevelopmentDeployment
dependsOn: Build
jobs:
- deployment: LambdaDevelopment
pool:
vmImage: "ubuntu-latest"
environment: "Development"
strategy:
runOnce:
deploy:
steps:
- script: |
sudo apt-get install awscli
aws configure set aws_access_key_id $(AWS_ACCESS_KEY_ID)
aws configure set aws_secret_access_key $(AWS_SECRET_KEY_ID)
aws configure set aws_default_region $(AWS_DEFAULT_REGION)
displayName: "install and configure AWS CLI"
- script: |
aws s3 cp $(Pipeline.Workspace)/LambdaBuild/s/$(AWS_CLOUDFORMATION_TEMPLATE_FILE_NAME) s3://$(AWS_S3_STAGING_BUCKET_NAME)
aws s3 cp $(Pipeline.Workspace)/LambdaBuild/a/LambdaBuild.zip s3://$(AWS_S3_STAGING_BUCKET_NAME)
displayName: "upload CloudFormation template and Lambda function ZIP build to staging bucket"
- script: |
aws cloudformation deploy --stack-name $(AWS_STACK_NAME_DEVELOPMENT) --template-file $(Pipeline.Workspace)/LambdaBuild/s/$(AWS_CLOUDFORMATION_TEMPLATE_FILE_NAME) --tags Environment=Development --capabilities CAPABILITY_NAMED_IAM --no-fail-on-empty-changeset
displayName: "updating CloudFormation stack"

Note that I have parameterized certain inputs (i.e. $(AWS_ACCESS_KEY_ID)) as build environment variables to be reusable and secure. Again, these are managed via settings in Azure DevOps and not committed to source control.

A Note on Sharing Files Among Pipeline Stages

Because each stage in the Azure Pipeline spins up a separate virtual machine, files such as the build artifact are not immediately accessible between build stages. In the build stage, a task can be added to publish a pipeline artifact (accessible via the path $(Pipeline.Workspace) path) that can be shared between stages.

azure-pipelines.yml
- task: PublishPipelineArtifact@1
inputs:
targetPath: "$(Pipeline.Workspace)"
artifact: "LambdaBuild"
publishLocation: "pipeline"

Security Checks

Most organizations will require some sort of human approval before migrating to production. This can be configured via Azure DevOps at an environment level. From the web UI, each environment can be configured with separate approvers. For this project, I have configured it so that only production requires approval.

Limiting Production Deployments to the Master Branch Only

As part of a continuous deployment implementation, production migrations should happen every time that the master branch is updated via a pull request. However, all branches should still be privy to the CI/CD benefits. In the Azure Pipelines YAML script, the production stage can be configured to be skipped if the source branch is not master:

azure-pipelines.yml
- stage: ProductionDeployment
condition: and(succeeded(), eq(variables['build.sourceBranch'], 'refs/heads/master'))
dependsOn: TestDeployment

This prevents developers from having to manually reject or skip releases from non-master branches that should never go to production.

Microsoft Ignite 2019

· 5 min read
Scottie Enriquez
Senior Solutions Developer at Amazon Web Services

Contents

  • .NET 5: The Future
  • Unique Azure Functions Features
  • Microsoft Edge Chromium
  • .NET Support for Jupyter Notebooks

.NET 5: The Future

.NET Core 3.1 will be released in December 2019 as a minor release focusing on enhancements to Blazor and desktop development. As for a .NET roadmap, Scott Hanselman and Scott Hunter also mentioned that there will not be a .NET Core 4.x release. The underlying idea is that it would collide with the well-known 4.x .NET Framework versions that still have widespread production use to this day. Starting in November 2020, there will no longer be .NET Core or Framework, but instead, they will merge into a unified platform simply known as .NET 5. Each November a new major version of .NET will be released (i.e. .NET 6 in 2021, .NET 7 in 2022, etc.).

The message around .NET Framework versus .NET Core remains the same: there's not an imperative need to migrate all .NET Framework projects to .NET Core, however, .NET Framework should not be used for any new projects going forward. Windows will continue to ship with .NET Framework, and .NET Core continues to expand its self-contained offerings (i.e. .NET Core 3.0 adding the ability to build an executable with the runtime included).

Unique Azure Function Features

My expertise is in AWS, so I figured that I'd note a couple of key features that Azure Functions offer in the serverless space not available in Lambda. The first is the ability to deploy containers as serverless functions. While you can create similar functionality using Fargate, it's awesome to see this function built into Microsoft's serverless offering.

It's easy to stand up a new Azure Function with full Docker support in just a few minutes. Start by installing the Azure Functions CLI tools via NPM with the command npm install -g azure-functions-core-tools and creating a function with Docker support using func init --docker --force. The latter command will create a new .NET project as well as a Dockerfile. Run func new to select from a list of starter templates for your new Azure Function. You now have a scaffolded function for a number of use cases such as an HTTP trigger, CosmosDB trigger, or Event Grid trigger.

We're now ready to build and run using the CLI by using: func start --build. Note that you can also use typical Docker commands: docker build -t azure-func-demo . and docker run -p 8080:80 -it ignite-azure-func. You can verify that the function is running by navigating to the homepage at http://localhost:7071 (or whichever port you've specified).

Once you've implemented your logic and pushed the image to DockerHub (i.e. docker push) or any other container registry, you can then deploy the container using the Azure CLI: az functionapp create --name APP_NAME … --deployment-container-image-name DOCKER_ID/DOCKER_IMAGE.

The other feature that sets Azure Functions apart from AWS Lambda is the new Premium plan that's currently in preview. This allows you to have a specified number of pre-warmed instances for your serverless function. One of the key drawbacks of using serverless functions in any architecture is the performance hit from cold starts. Cold starts occur when the serverless function hasn't been run in some time and thus there is the additional latency of loading your function onto the underlying infrastructure. With pre-warmed instances, you can reap the performance of PaaS solutions with a serverless architecture.

Microsoft Edge Chromium

I downloaded the new Microsoft Edge on my MacBook Pro and have been using it as my default browser for the past week during the conference. I never thought I'd say those words in a million years.

As Satya Nadella mentioned in his keynote, Microsoft Edge Beta 79 was released on November 4th, 2019. This is the release candidate before it comes to the general public in January 2020. There are currently three channels that you can subscribe to: canary (daily builds), development (weekly builds), or beta (builds every six weeks). What makes this so significant to the web development community is that its build on the Chromium engine. After millions and millions of lines of code have collectively been written to handle Internet Explorer's quirks and create consistent, cross-browser builds, we're finally here.

From an enterprise perspective, this is game-changing for developers. Internet Explorer has persisted due to it being the de facto Windows standard browser. Many large companies like mine require that our websites be compatible with a version of Internet Explorer as the lowest common denominator. In addition to a Chromium-based browser now taking its place, Edge also provides a compatibility mode that allows legacy sites to seamlessly work alongside all of the latest advancements of the web. No additional code changes are required for now.

I have to confess that I'm extremely impressed with it. The user experience is quite smooth. I'm a huge fan of the privacy features that allow for strict tracking prevention out of the box. In terms of addons and extensions, the list is small but growing. There's support for some of the biggest names like uBlock Origin, but more importantly, you can add extensions from the Google Chrome store as well. I added the React extension with no issues. As for the developer tools, they're just like Google Chrome's. No longer do I have to fumble through the clunky performance and UI of Internet Explorer's developer console whenever some obscure issue pops up.

Last but not least, the Touch Bar support for MacBook is quite solid as well. I'm a huge fan of the way that they've utilized the real estate by having each tab's favicon be a button that switches to it.

.NET Support for Jupyter Notebooks

Jupyter for .NET

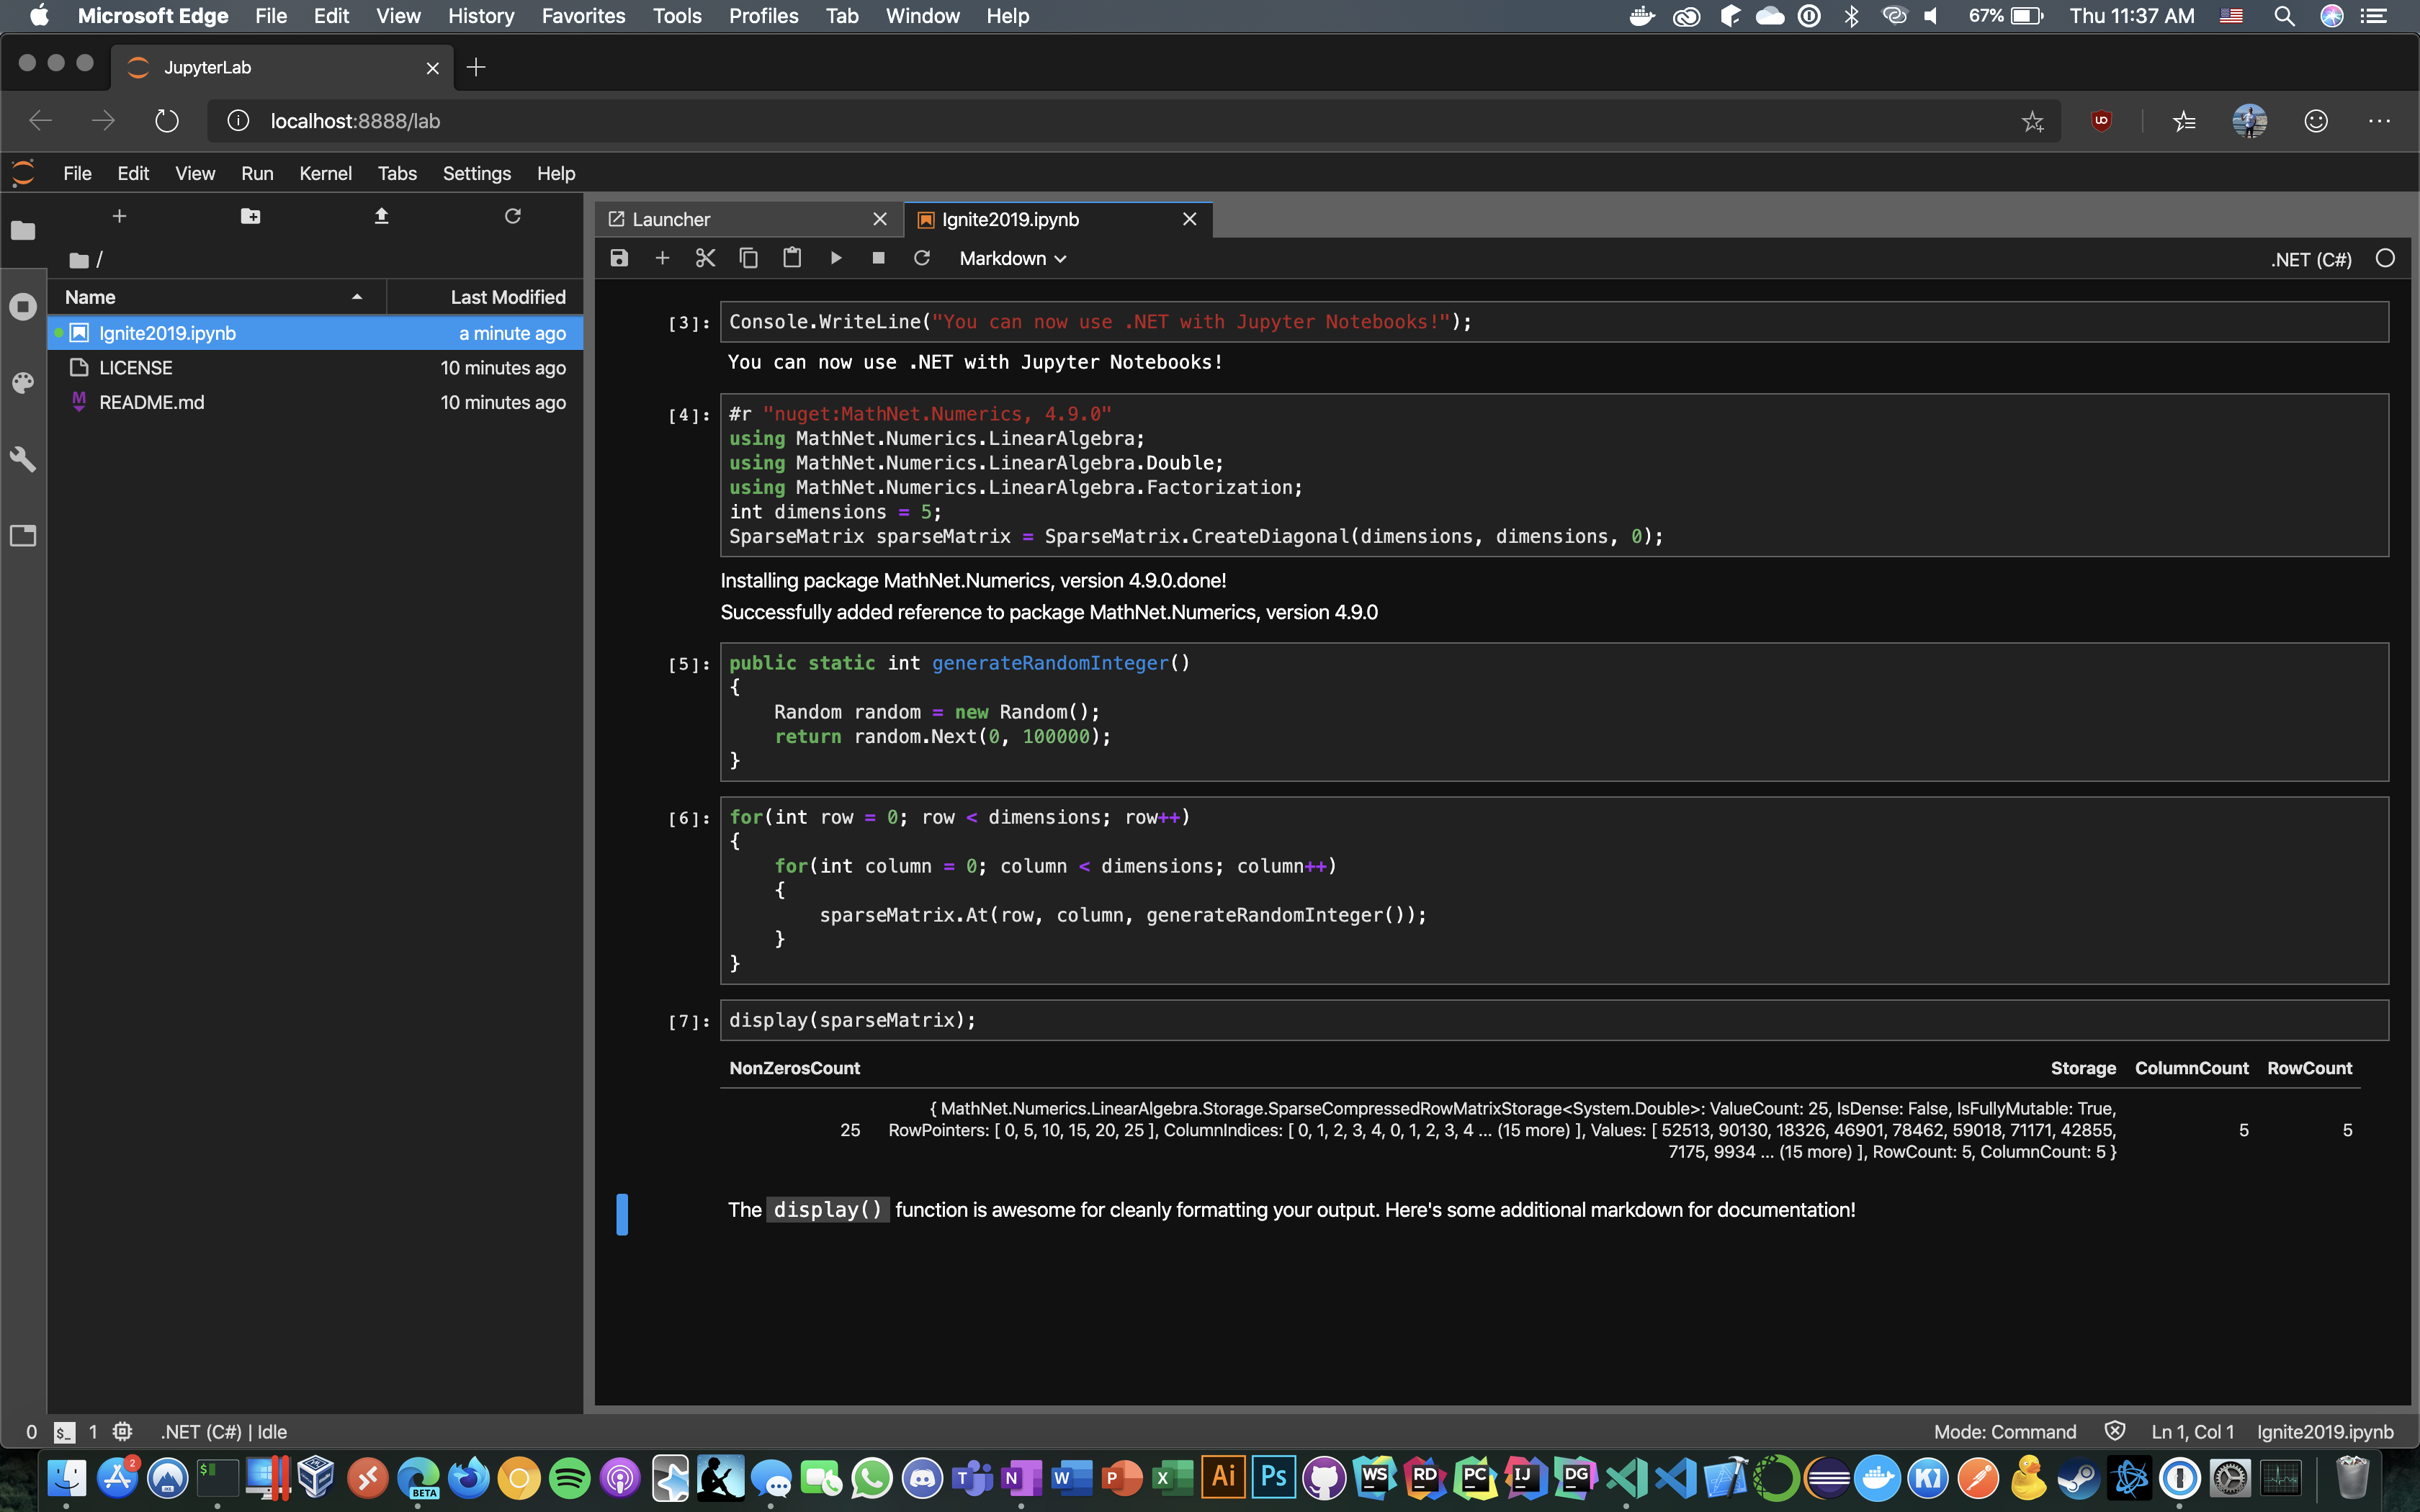
.NET now supports Jupyter which allows for code sharing, documentation, and reporting opportunities. In addition to running .NET code, it even supports fetching external dependencies via NuGet on the fly.

Visual Studio Live 2019: San Diego

· 13 min read
Scottie Enriquez
Senior Solutions Developer at Amazon Web Services

Contents

Visual Studio Live in San Diego was an amazing opportunity to learn about new Microsoft technology like Azure's artificial intelligence offerings and .NET Core 3.0. I attended some talks about leadership and Agile as well. I've put together several proofs of concept and documented what I learned about:

  • Azure Cognitive Services
  • ASP.NET Core Health Checks and Startup.cs Inline Endpoints
  • .NET Core CLI Tooling for AWS Lambda
  • .NET Core 3.0 Linux Worker with systemd Integration
  • Windows Subsystem for Linux 2 and Windows Terminal
  • The Dynamics of a Healthy Team
  • Goodhart's Law and the Hawthorne Effect

Azure Cognitive Services

The keynote this year was AI for the Rest of Us and was delivered by Damian Brady. One of the core themes of the talk is that artificial intelligence and machine learning has become infinitely more accessible to programmers. Cloud providers have made their algorithms and statistical models available via easily consumable RESTful services. Much of the talk centered around a sample web application that consumed Azure's out-of-the-box computer vision and translation services to manage a company's inventory. One feature was identifying an item in a picture returned to a warehouse. Another was translating foreign customer reviews to English and analyzing their sentiment.

I decided to put together a couple of quick demos and was truly amazed with the results. In about 20 lines of Python 3 code and 10 minutes, I was able to read text from an image on a whiteboard. You can find a pipenv-enabled demo here.

main.py
subscription_key = os.environ['COMPUTER_VISION_SUBSCRIPTION_KEY']
endpoint = os.environ['COMPUTER_VISION_ENDPOINT']
computervision_client = ComputerVisionClient(endpoint, CognitiveServicesCredentials(subscription_key))
remote_image_printed_text_url = 'https://scottie-io.s3.amazonaws.com/vslive-whiteboard.jpg'
recognize_printed_results = computervision_client.batch_read_file(remote_image_printed_text_url, raw=True)
operation_location_remote = recognize_printed_results.headers["Operation-Location"]
operation_id = operation_location_remote.split("/")[-1]
while True:
get_printed_text_results = computervision_client.get_read_operation_result(operation_id)
if get_printed_text_results.status not in ['NotStarted', 'Running']:
break
time.sleep(1)
if get_printed_text_results.status == TextOperationStatusCodes.succeeded:
for text_result in get_printed_text_results.recognition_results:
for line in text_result.lines:
print(line.text)
print(line.bounding_box)

In about 10 lines of C# using .NET Core 3.0, I was able to detect the language and sentiment of generic text. You can find the full code here.

text-analytics/Program.cs
string textToAnalyze = "今年最強クラスの台風が週末3連休を直撃か...影響とその対策は?";
ApiKeyServiceClientCredentials credentials = new ApiKeyServiceClientCredentials(subscriptionKey);
TextAnalyticsClient client = new TextAnalyticsClient(credentials)
{
Endpoint = endpoint
};
OutputEncoding = System.Text.Encoding.UTF8;
LanguageResult languageResult = client.DetectLanguage(textToAnalyze);
Console.WriteLine($"Language: {languageResult.DetectedLanguages[0].Name}");
SentimentResult sentimentResult = client.Sentiment(textToAnalyze, languageResult.DetectedLanguages[0].Iso6391Name);
Console.WriteLine($"Sentiment Score: {sentimentResult.Score:0.00}");

These are features that I would have previously told clients were completely out of the question given the complex mathematics and large data set required to train the models. Developers can now reap the benefits of machine learning with virtually no knowledge of statistics.

ASP.NET Core Health Checks and Inline Endpoints

.NET Core now supports built-in service health checks that can be easily configured in Startup.cs with a couple of lines of code.

public class Startup
{
public void ConfigureServices(IServiceCollection services)
{
services.AddHealthChecks();
}

public void Configure(IApplicationBuilder app)
{
app.UseRouting();
app.UseEndpoints(endpoints =>
{
endpoints.MapHealthChecks("/health");
});
}
}

This creates a /health endpoint that returns an HTTP status code and brief message indicating whether or not the API is available and can process requests. This is ideal for integrating with load balancers, container orchestrators, and reports. If the default checks don't suffice for your needs, you can also create custom health check by implementing the IHealthCheck interface and registering it. Be aware that health checks are intended to be able to run quickly, so if the custom health check has to open connections with other systems or perform lengthy I/O, the polling cycle needs to account for that.

public class MyHealthCheck : IHealthCheck
{
public Task CheckHealthAsync(
HealthCheckContext context,
CancellationToken cancellationToken = default(CancellationToken))
{
return Task.FromResult(HealthCheckResult.Healthy("A healthy result."));
}
}

You can also create simple HTTP endpoints inline in Startup.cs without creating an API controller class in addition to registering API controllers normally.

app.UseEndpoints(endpoints =>
{
endpoints.MapControllers();
endpoints.Map("/startup", context =>
{
return context.Response.WriteAsync("This is from Startup.cs");
});
endpoints.MapHealthChecks("/health");
});

Find the complete source code here.

.NET Core CLI Tooling for AWS Lambda

AWS has built extensive CLI tooling and templating for building .NET Core serverless functions on Lambda. Assuming you have .NET Core installed and added to your PATH, you can run dotnet new -i Amazon.Lambda.Templates to install the Lambda templates and dotnet tool install -g Amazon.Lambda.Tools to install the Lambda tools. With a few commands, you can have a brand new .NET Core serverless function created, deployed to AWS, and invoke the function from the command line.

#!/usr/env/bin bash
# create a new serverless function from the Lambda template
dotnet new lambda.EmptyFunction --name MyFunction
# validate that the skeleton builds and initial unit tests pass
dotnet test MyFunction/test/MyFunction.Tests/MyFunction.Tests.csproj
# navigate to the project directory
cd MyFunction/src/MyFunction
# deploy function to AWS
dotnet lambda deploy-function MyFunction --function-role role
# validate that the Lambda function was properly created
dotnet lambda invoke-function MyFunction --payload "Hello, world!"

.NET Core 3.0 Linux Worker with systemd Integration

When I first wrote my first line of C# code back in 2012 as a young intern, .NET Core didn’t exist yet. At the time, .NET hadn't been open-sourced yet either. While powerful, .NET Framework was monolithic and only ran on Windows natively. Throughout college, I used Ubuntu and macOS and hadn't touched a Windows machine in years except for gaming. As a student, I fell in love with shells and preferred CLIs over cumbersome IDEs. While I remained a Unix enthusiast at home (macOS, Debian, and Manjaro), I felt that there was such a clear divide between this enterprise tool and the up-and-coming juggernaut in Node.js that was beginning to eat the server-side market share in an explosion of microscopic NPM packages.

Though I grew to love the crisp C# syntax and bundles of functionality in .NET Framework, .NET Core made me fall in love again. The first time that I wrote dotnet build and dotnet run on macOS was such a strange feeling. Even though Mono brought the CLR to Linux many years ago, being able to compile and run C# code on the .NET runtime out of the box was so satisfying. Sometimes, it still blows me away that I have a fully fledged .NET IDE in JetBrains' Rider running on my Debian box. All this to say, Microsoft's commitment to Linux makes me excited for the future.

At Visual Studio Live this year, one of the new features discussed is systemd integration on Linux, which is analogous to writing Windows Services. The thought of writing a systemd service using .NET Core 3.0 (which was just released a few days ago) was pretty exciting, so I put together a fully functional example project to capture and log internet download speeds every minute.

I started by using the worker service template included in both Visual Studio and Rider. Configuring for systemd only requires one chained call: .UseSystemd(). It's worth noting that this still allows you to build and run using the CLI (i.e. dotnet run) without being integrated with systemd.

src/SpeedTestWorkerService/SpeedTestWorkerService/Program.cs
public static IHostBuilder CreateHostBuilder(string[] args) =>
Host.CreateDefaultBuilder(args)
.UseSystemd()
.ConfigureServices((hostContext, services) => { services.AddHostedService(); });

The Worker executes the given task until a cancellation token is received. I made a few modifications to the starter template such as changing the Task.Delay() millisecond parameter and implementing the speed test logic. Note that _logger is the dependency injected logging service.

src/SpeedTestWorkerService/SpeedTestWorkerService/Worker.cs
protected override async Task ExecuteAsync(CancellationToken stoppingToken)
{
while (!stoppingToken.IsCancellationRequested)
{
SpeedTestClient speedTestClient = new SpeedTestClient();
Settings settings = speedTestClient.GetSettings();
Server bestServer = settings.Servers[0];
_logger.LogInformation("Server name: " + bestServer.Name);
double downloadSpeed = speedTestClient.TestDownloadSpeed(bestServer);
_logger.LogInformation("Download speed (kbps): " + downloadSpeed);
await Task.Delay(60000, stoppingToken);
}
}

I also implemented a simple deployment script to migrate the .service file to the correct folder for systemd, map the executable, and start the service. The rest is handled by .NET Core.

#!/usr/env/bin bash
dotnet build
dotnet publish -c Release -r linux-x64 --self-contained true
sudo cp speedtest.service /etc/systemd/system/speedtest.service
sudo systemctl daemon-reload
sudo systemctl start speedtest.service

Windows Subsystem for Linux 2 and Windows Terminal

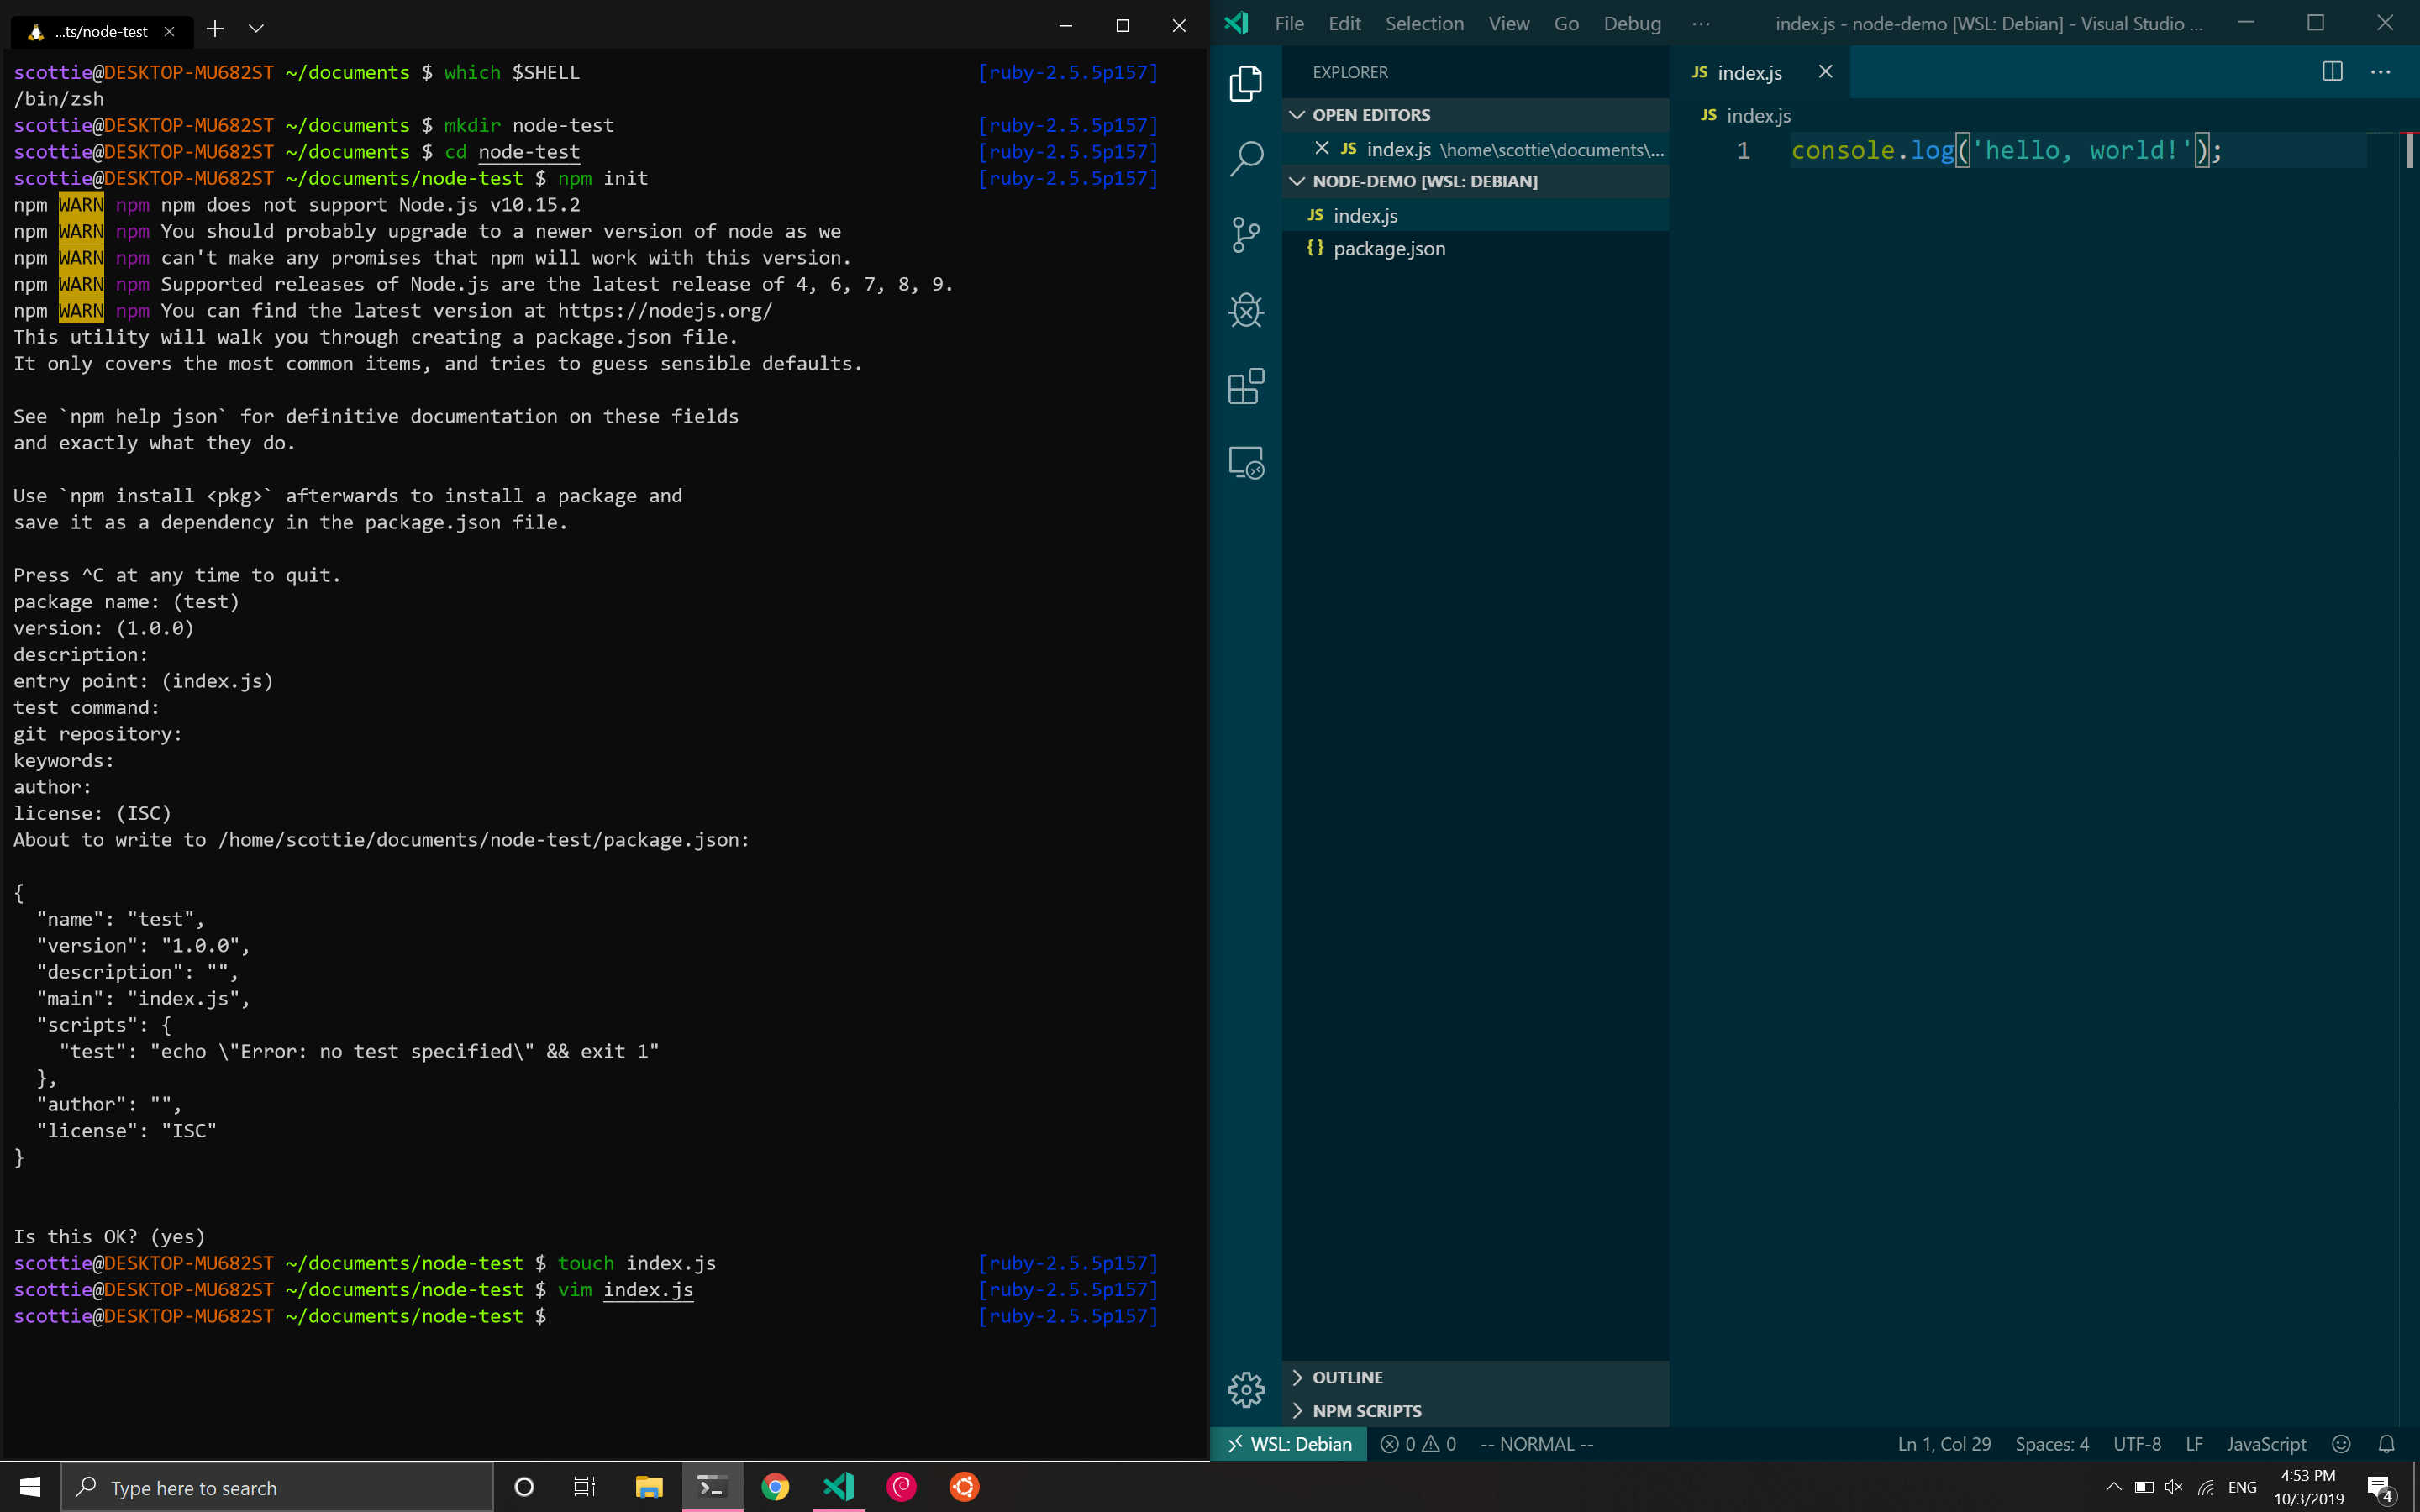
Though many of the talks at Visual Studio Live utilized Linux environments in Azure and AWS, none of the presenters developed in Linux during their demos. Instead they used WSL2 with Windows Terminal. In the latest Insiders build of Windows 10 (build 18917 or higher), Microsoft has shipped a Linux kernel too. This kernel has been specifically tuned for WSL2 and the performance is extremely solid. You can now also install various distros (i.e. Debian, Ubuntu) from the Microsoft Store and interact with them via a CLI.

You can also combine this with a preview of the new Windows Terminal. Which allows you to have multiple tabs running command lines for various environments simultaneously (i.e. PowerShell, Linux, etc.). You can even modify files on your Linux file system with Visual Studio code via a nifty plugin.

WSL

I installed Debian 10 plus my usual Linux tools like Vim and Zsh and found that the performance and usability were solid. I even went as far as to install and use some tools that aren't easy to use on Windows like Docker. I was able to run containers without any performance issues. Though all of these features and tools are still in preview, it shows Microsoft's commitment to Linux going forward. It also makes software development on Windows a lot more appealing in my opinion given that the majority of cloud infrastructure runs Linux.

The Dynamics of a Healthy Team

Though there were numerous exciting technical sessions throughout the week, some of my most valuable takeaways from the conference came from Angela Dugan's talks about leadership and metrics. Many of her points echoed much of the reading that I've done since transitioning to leadership about a year ago.

The first takeaway is that as leaders we need to find ways to create more continuous collaboration. According to quantitative surveys and informal discussion, one common complaint is that my team's developers often work alone on projects. While they often collaborate with business analysts and solution integrators outside of our team, it's quite common for us to only have the bandwidth to assign one software developer given their supply and demand. A recurring theme from the conference talks and Certified Scrum Master training is that cohesion and chemistry comes from the same team working on different projects.

One way to help achieve this goal is to decrease the number of simultaneous projects (i.e. works-in-progress) assigned to a developer. Admittedly, this is an area that I've fallen short in as a leader. In terms of resource planning, trying to make ends meet feels like a game of Tetris. It's difficult to prevent and manage an extensive buildup of backlog items, but managing client relations and expectations is even harder. For the sake of business satisfaction, we'll often compromise by dividing a developer's time between multiple efforts so that the clients feel that they're getting a timely response time. However, the taxes of context switching negate the benefits of being able to focus on one project at a time. Fundamentally, this is analogous to the divide and conquer principle in computer science. Even the smartest humans are bad at multitasking.

The final takeaway I had was that it's not enough to merely identify cultural and personality differences. My team has taken multiple personality tests to understand how we all view the world differently. As a company, we've hosted numerous multicultural events to understand how culture impacts our work (see Outliers by Malcolm Gladwell). However, I feel that my team doesn't necessarily work any differently despite these efforts yet.

Goodhart's Law and the Hawthorne Effect

During a fantastic talk on the dangers and benefits of collecting metrics, Angela introduced these two concepts that eloquently summed up some of the challenges my team has with identifying and reporting on quality metrics: Goodhart's Law and the Hawthorne Effect.

Goodhart's Law states that "when a measure becomes a target, it ceases to be a good measure." During the presentation, my mind immediately wandered to the arbitrary metric of time. Like many other giant corporations, my company has countless avenues of tracking time. I had a simple hypothesis that I was able to quickly validate by pulling up my timesheets: my hours always add up to 40 hours per week. If I have a doctor's appointment in the morning, I don't always stay late to offset it. On days that I have an 8pm CST call with Australia, I don't always get to leave the office early to get that time back. My boss certainly doesn't care, and I certainly wouldn't sweat a developer on my team for not working exactly 40 hours per week.

So why has time become the key target? Hypothetically, if I only worked 20 hours in a given week, nothing is stopping me from marking 40 hours. No one in their right mind is going to enter less than that. I'd also argue that some people wouldn't feel empowered to enter more than that. In reality, numerous other metrics would reflect my poor performance. All this makes me realize that any metric that's self-reported with arbitrary targets and a negative perception of its intentions is going to lead to false information and highly defensive data entry.

The next logical progression is considering a burndown chart. The x-axis represents time, and the y-axis often represents remaining effort in a two-week sprint. In a utopian world, the line of best fit would be a linear function with a negative slope. The reality is that project or portfolio managers call me when the burndown rate isn't fast enough for their liking. But again, why is the focus here time? Why aren't the most important metrics features delivered and customer satisfaction? Why not a burnup chart?

The Hawthorne Effect refers to the performance improvement that occurs when increased attention is paid to an employee's work. For a simple thought experiment, imagine that your job is to manually copy data from one system to another. Naturally, your throughput would be substantially improved if you got frequent feedback on how much data you were copying. It would probably also increase if your boss sat right behind you all day.

In leadership, we constantly observe our employees' work though I would argue it's rarely in the most productive contexts. Instead of measuring developers purely based on how many features they deliver, we almost always relate them to the estimates they're forced to give based on minimal and sometimes incorrect requirements as well as arbitrary and often unrealistic dates set by both ourselves and our customers. I can think of several metrics I track to report on project and operation health, but none that reflect a developer's happiness or psychological safety.

As a leader, I've fallen short in shielding developers from this. Consider the difference between "can you have this feature done by the end of the year?" and "how long will it take to deliver this feature?" The answer should ultimately be static between the two scenarios, but in the former question, I'm shifting the responsibility to deliver onto the developer. The developer feels immense pressure to conform their estimate to the context they've been placed in. As a leader, the responsibility should fall solely on me though. If the developer can't deliver the feature by the end of the year, it's up to me to acquire another resource or set more realistic expectations with the client.

Gaming on EC2

· 5 min read
Scottie Enriquez
Senior Solutions Developer at Amazon Web Services

The Idea

For a quick weekend project, I wanted to see how feasible setting up a cloud gaming rig would be. Using EC2 from AWS and about 10 USD, I was able to get a proof of concept set up and several games installed and running. I did run into a few issues that this post should address how to get around.

Choosing an AMI

An Amazon Machine Image is a virtual appliance used to create a virtual machine in EC2. These AMIs span a variety of purposes and use a *NIX or Windows operating system. You can create your own AMIs, use community-provided AMIs, or subscribe to one from the AWS Marketplace. It’s worth noting that the last option tacks on an additional hourly cost in addition to the base EC2 computing costs. In the interest of time, I opted to start with a marketplace AMI specifically purposed for gaming with the requisite graphics drivers preinstalled.

Launching an Instance

Per the AMI’s recommendation, I provisioned a g3.4xlarge EC2 instance. As you might expect from an instance that carries a nearly 2 USD/hour price tag, the resources are quite powerful: 16 vCPUs, 122 GiB RAM, and an NVIDIA Tesla GPU. Most of the default settings should work, but be sure to provision an SSD larger than the default 30 GB given that most AAA games now are nearly twice that in size.

Always remember to shut the server down when you’re not using it and verify that it’s instance state is listed as stopped in your EC2 console. I would highly recommend configuring a billing alarm to avoid surprising charges, as well as configuring your EC2 instance to stop when you shut down.

Connecting to the EC2 Instance

Once the instance has been provisioned, you can connect to it via RDP. For macOS users, you can download Microsoft Remote Desktop 10 via the App Store. If you configured a key pair when launching your VM, download and locate the .pem file. In order to log into your new server, you’ll need the password for Administrator as well as the public hostname. To obtain the password, simply right-click on the instance and choose Get Windows Password and provide the private key if need be. To obtain the public hostname, simply refer to the description tab beneath the running instance. You can also download a Remote Desktop (.rdp) file via the right-click menu.

EC2 instance

Initial Configuration and Installing Software

Windows Server 2016 is a highly stripped-down version of Windows 10. You’ll notice that the only browser installed is Internet Explorer running in Enhanced Security mode. I’d highly recommend starting by disabling this mode or installing Google Chrome. You’ll also need to enable some services that aren’t turned on by default. Via the Server Manager, start by enabling the WLAN service and .NET Frameworks. You’ll also need to enable sound as well.

I wanted to see how well such a powerful VM could run a graphically intensive game, so I chose The Witcher 3. In addition to downloading the game and Steam, I also installed the GeForce Experience app from NVIDIA to ensure that my graphics drivers were the latest available. Assuming that you chose the same AMI that I did, the latest drivers should already be pre-installed.

Running Games

After doing all of the setup above, I received D3D errors from every game that I tried to run. I was able to get past this error by running the game in windowed mode or specifying a resolution via the launch options: -windowed or -h 1920 -w 1080.

Tweaking Your Settings

I was able to get solid performance on both my MacBook’s Retina Display as well as a standard 1080p monitor. Never having done anything graphically intensive on a Windows VM, I wasn’t aware that you can’t change your resolution from the VM itself. Rather, configuration needs to be done via your RDP client. As you probably expect, these settings are heavily dependent on the display that you’re playing on.

It’s also worth noting that unless you provision an Elastic IP Address, your public hostname and IP will change every time you start and stop the EC2 instance. This means that if you don’t have a static IP address in place, you’ll need to either download a fresh .rdp file or update your hostname in the RDP client constantly.

Latency and Limitations

I was able to play The Witcher 3 with bearable latency though I don’t know that this setup would be feasible for multiplayer or competitive gaming. Per the AMI’s documentation, the streaming limit is 1080p with 30 frames per second. This means that while the VM is powerful enough to achieve higher FPS at a higher resolution, the bottleneck will ultimately be its streaming bandwidth.

Laptop

Configuring Multiple SSL Certs for a Single Elastic Beanstalk Instance

· 2 min read
Scottie Enriquez
Senior Solutions Developer at Amazon Web Services

The Use Case

I own two domains for my personal site. I have a primary domain that I use for most occasions, but I also recently acquired another. Rather than having the second domain remain unused, my goal was simply to have both configured simultaneously without configuring multiple environments.

The Architecture

My website has used HTTPS for some time, but this initially complicated the plan of using two domains in parallel. I’ve been hosting this website on Amazon Web Services via Elastic Beanstalk for about three years now. The process of managing SSL certificates has been quite easy using a combination of Elastic Load Balancing and AWS Certificate Manager. However, what’s now known as a Classic Load Balancer only supports one certificate per port and protocol (i.e. HTTPS, 443). Given that SSL certificates are tied to one domain, the lone certificate on the load balancer would not be valid for my second domain and a security warning would be thrown in the browser.

Migrating to an Application Load Balancer

Since my Elastic Beanstalk environment was configured before the new Application Load Balancer was released, I laid it to rest and provisioned a fresh application with one. There may be a way via the settings to convert an existing Classic Load Balancer to Application Load Balancer, but I was unable to find a quick solution. You can find the differences between load balancer offerings in Amazon’s documentation.

Configuring the Listener

Unless specified otherwise during the provisioning process, no HTTPS listener will be configured. Just like my Classic Load Balancer, I created an HTTPS listener on port 443 and chose my primary domain’s SSL certificate from ACM as the default. Application Load Balancers also only allow one listener per protocol, so one more step must be taken.

Listener

Adding Certificates

Via the EC2 interface you can edit your load balancer’s listeners settings and add more SSL certificates. That’s all you need to configure.

SSL

The rest is handled by the magic of Server Name Indication (SNI) which Application Load Balancers use as of October 2017. The load balancer will use the correct SSL certificate based on the domain specified in the request.

Mitigating Risk With Using Google Maps API Keys in the Browser

· 3 min read
Scottie Enriquez
Senior Solutions Developer at Amazon Web Services

Recently, Google announced significant changes to the Maps platform to mixed reactions from the development community. While the myriad of products have now been combined and refactored for simplicity, the general concerns seem to stem around a steep increase in price, a Google billing account requirement, falling victim to overage charges from DDoS attacks, and a mere 30-day notice of these changes. All of these factors have many developers (especially of small to medium-sized projects) considering other platforms for map services.

It’s also worth noting that a valid API key is now required. This may seem like a non-factor to developers properly managing credentials on the backend as to not expose them to the client. However, the Maps Embed API requires the key as a parameter in an HTML script tag like so:

src="https://maps.googleapis.com/maps/api/js?key=MY_API_KEY"

When I first added this to my projects, I certainly had concerns about not only exposing the key to the browser via HTML, but also commiting to publicly available source code. There are a few important steps that should be taken to mitigate risk, especially considering the drastic increase in price.

Minimizing Permissions for API Keys

Creating an API key for Google Maps is quite simple, but it’s not obvious that by default the key has various services enabled for it including Embed, JavaScript, iOS and Android. While basic security principles dictate that you should grant the minimum permissions required, this need is escalated by the fact that if you use the API key in the browser, you're effectively sharing it with the entire world. Theoretically, you could intercept someone’s key from their web application and use it for any of the services that are enabled for it. For use in the browser, only two APIs are required: Embed and JavaScript.

Restricting Referrer Domains or IP Addresses

Even if you’ve only allowed your key access to the minimum APIs, by default any site on any domain could rack up charges on your Google account by simply using your key on their site. To combat this, you should specify restrictions via a regular expression that fits your domain or IP. For example, my key is restricted to https://www.scottie.is/*.

Set a Billing Alarm

If you’re already a developer using the Maps platform, the email announcing these changes should have given you some indication of whether or not your monthly charges will change. Regardless, setting a billing alarm will help prevent unexpected charges and give warning of unexpectedly high usage.

Getting Started with Python and Flask on AWS

· 6 min read
Scottie Enriquez
Senior Solutions Developer at Amazon Web Services

Getting Started: Convention Over Configuration

This software development paradigm has become prevalent in many modern frameworks and tools. It can be described as streamlining and standardizing aspects of development similar to all or most projects while specifying configurations for those that deviate from the established convention. For example, most Node.js developers call their main file server.js. Let’s say that I want to write a generic deployment script for Node.js applications. It’s much easier to include a simple command like node server.js than to try to determine the developer’s intended start file. This simple agreement saves a great deal of time and configuration details. The emphasis of this paradigm is that the knowledge will hold for any team or company, and so organizations full of old tribal knowledge become a thing of the past.

Personally, I’m a huge proponent of convention over configuration. Amazon Web Services use this paradigm as well as part of their Platform as a Service offerings, but unfortunately the documentation is sparse, which is the main downfall of convention over configuration. Simply put, if no one knows about your convention or which conventions you’re opting to use, it’s ultimately useless. Soapbox aside, I’m going to cover how I got my initial Python environment setup and some conventions necessary for successful deployment.

Setting Up a Python Environment Using Elastic Beanstalk

I initially tried to use this guide from Amazon to deploy a simple RESTful service built with Flask. I’m not an infrastructure person at all, so I struggled through the steps. I failed to produce anything meaningful, so I decided to switch up my approach. One odd thing about this documentation, other than the fact that it was created in 2010, is that this seems to be the Infrastructure as a Service approach. The instructions have you provisioning an EC2 instance and creating your own virtual environment, then manually starting and stopping Elastic Beanstalk. As a developer, I like being abstracted from all of that whenever possible, so I decided to use the Platform as a Service approach instead.

The first step is to create your application using Elastic Beanstalk via the AWS Management Console. When you create your new application, AWS will automatically create an EC2 instance for your application to reside on. During this initial setup, you can specify what predefined configuration you want to use such as Python, Node.js, and PHP. For the sake of this demo, choose Python. Once you choose the rest of your options, most of which are overkill for this simple demo, AWS will create your application within a few minutes.

Configuring Your Local Machine

While your application and EC2 instance are being provisioned, start preparing your local machine. First of all, install the Elastic Beanstalk command line tools via pip or Homebrew if using Mac. Secondly, create an IAM user and store your credentials locally so that they are not present in source code. Note that you can manage the roles and permissions for all users in the Identity and Access Management section of the AWS console. For the sake of this demo, be sure to grant the user the full S3 and Elastic Beanstalk access policies.

Testing the Code Locally

I have created a Python 2.7 demo for this post on hosted the code in this GitHub repository. You can clone the code using the following command in the desired directory: git clone git@github.com:scottenriquez/scottie-io-python-aws-demo.git. I've also included the source code below for convenience.

application.py
from flask import Flask, request, url_for, jsonify
from boto.s3.key import Key
import boto
import boto.s3.connection
import uuid

application = Flask(__name__)

@application.route("/data/", methods = ["POST"])
def data():
try:
data = request.form["data"]
connection = boto.connect_s3()
#update with your S3 bucket name here
bucket_name = "test"
bucket = connection.get_bucket(bucket_name, validate = False)
key = Key(bucket)
guid = uuid.uuid4()
key.key = guid
key.set_contents_from_string(data)
key.make_public()
return jsonify({"status" : "success"}), 201
except Exception as exception:
return jsonify({"status" : "error", "message" : str(exception)}), 500

if __name__ == "__main__":
application.run()
requirements.txt
flask==0.10.1
uuid==1.30
boto==2.38.0

After obtaining the code, make sure the proper dependencies are installed on your machine. This demo requires three pip packages: Flask, UUID, and Boto. Be sure to create an S3 bucket and update the code to target your desired bucket. Once all of this is configured, you can run the code using the command python application.py.

This code creates a simple RESTful service that takes raw data and stores it as an S3 file with a universally unique identifier for the name. To test the code, use a REST client like Postman to perform an HTTP POST on http://localhost:5000/data/ with the parameter called data containing the data to be posted to S3. The service will return a JSON message with either a status of "success" or an exception message if something went wrong.

Deploying to Elastic Beanstalk

It’s important to note that the names of the two files cannot be changed. As mentioned in the first paragraph, AWS uses convention over configuration. When deploying, Elastic Beanstalk searches for a file called application.py to run. The other file is used to manage dependencies. If you didn’t have the three required pip packages on your local machine, you simply fetched them. Due to autoscaling and other factors, you can’t guarantee that the server that your code is deployed to contains the packages that your code depend on prior to deployment. Because of this, rather than using SSH to connect to an EC2 instance and executing several pip install commands for every new instance, it's best to list of all dependent packages and versions inside of a file called requirements.txt. This way whenever the code is deployed to a new EC2 instance, the build process knows which packages to fetch and install.

Once the code is working locally, we’re ready to deploy to AWS. Start by running the eb init command in the code’s directory. Be sure to choose the same region that was specified when the Elastic Beanstalk application was created. You can verify that the environment was created properly by running the command eb list or simply run eb for a list of all available commands. After initialization, execute eb deploy. The status of the deployment can be monitored via the command line or the AWS console. Once the deployment is completed, testing can be done via the same REST client, but substitute the localhost URL for the Elastic Beanstalk specified one.

You now have a working Python REST service on AWS!